
Cute Nails: 36 Simple, Playful & Pretty Design Ideas
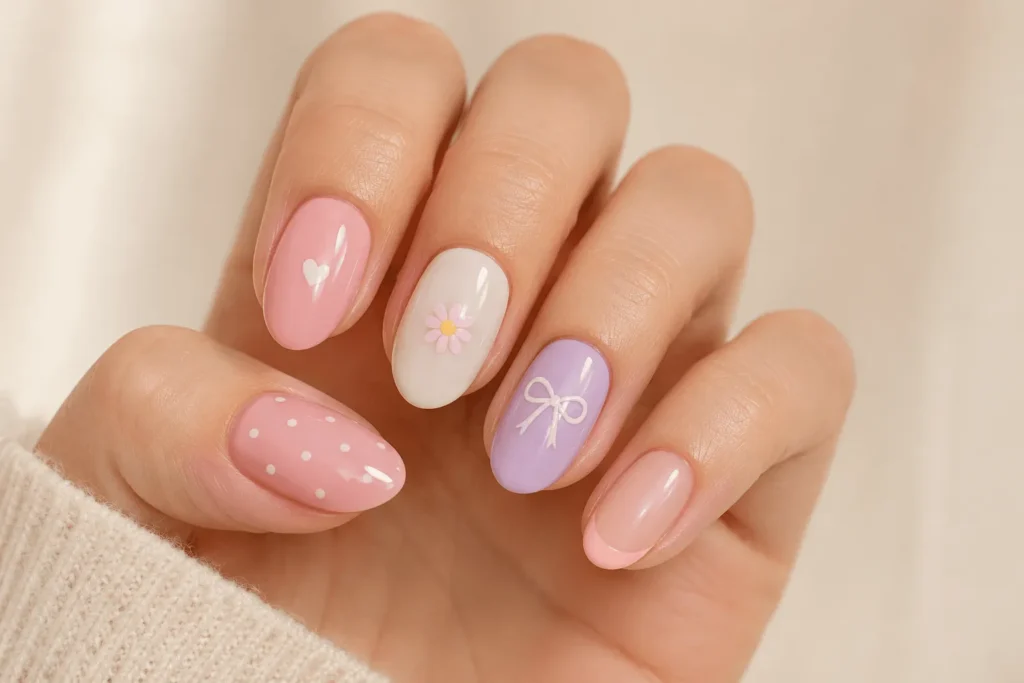
Cute nails can be as simple as glossy baby-pink polish or as detailed as tiny bows, cherry accents, and 3D flowers. These 36 nail designs cover soft colors, playful patterns, French tips, and statement art, with options for short natural nails and longer sets.
Cute Nail Designs to Save
Cute Nails Without Nail Art
A cute manicure doesn’t need painted flowers or miniature decorations. Color, nail shape, and finish can carry the entire look.
1. Glossy Baby-Pink Nails
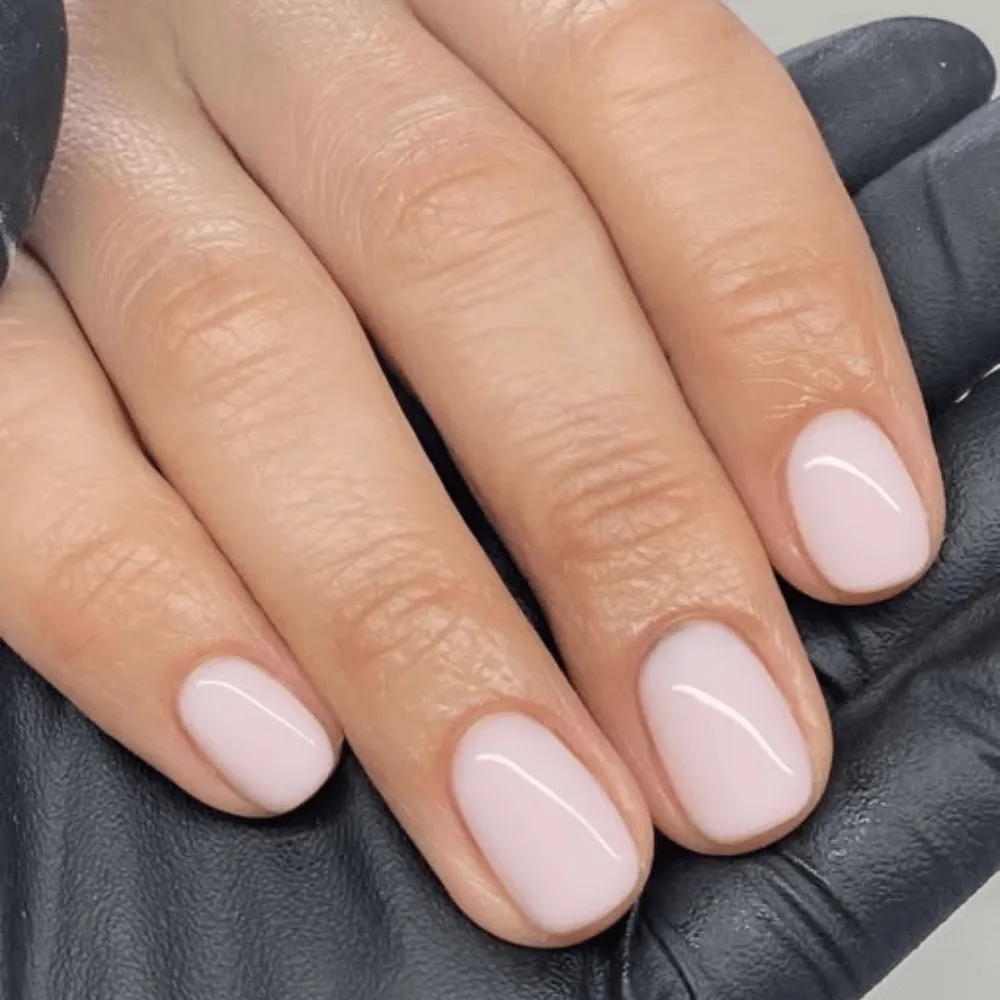
Baby pink gives a manicure a soft wash of color without covering the nails in artwork. A smooth, glossy finish keeps the shade looking clean, especially on short oval or squoval nails.
The shade makes a difference here. A sheer pink allows some of the natural nail to show through, while an opaque baby pink creates a more noticeable, candy-colored finish.
2. Peach Jelly Nails
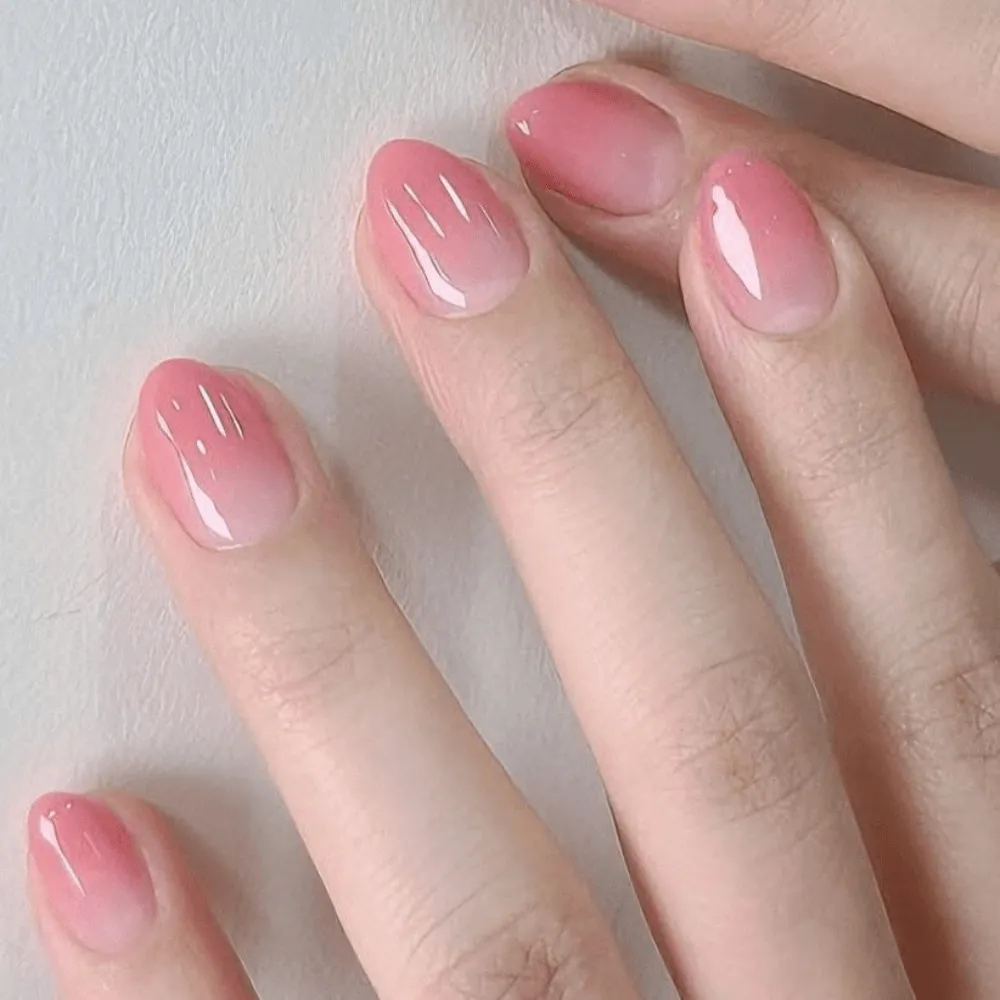
Peach jelly nails have a translucent, juicy-looking finish that sets them apart from ordinary cream polish. The natural nail remains partly visible through the color, giving the manicure a lighter appearance.
A warm peach looks especially different from cool baby pink in natural daylight. Keep the finish glossy and the color translucent if you want the distinctive jelly effect rather than a solid peach manicure.
3. Mismatched Pastel Nails
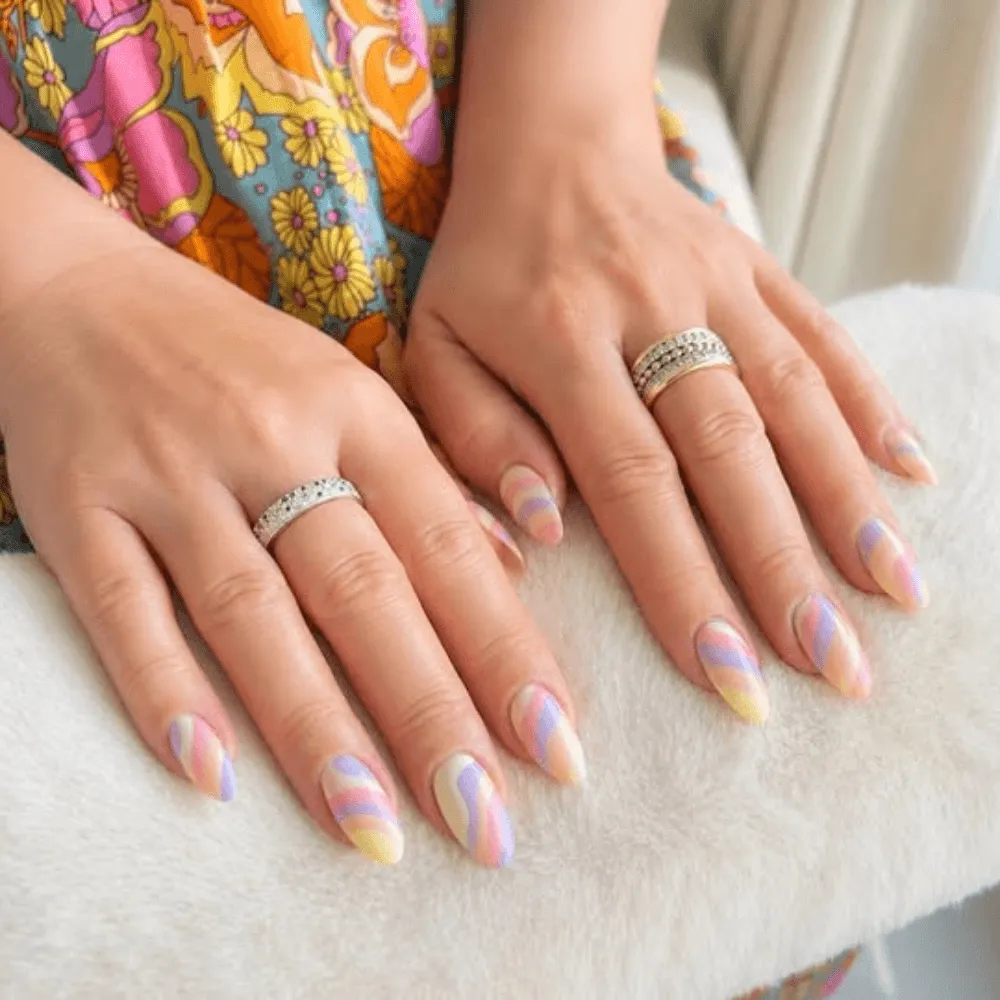
A different pastel shade on each nail creates a colorful manicure without needing any hand-painted patterns. Baby blue, butter yellow, lavender, mint, and pale pink make an easy combination.
The colors don’t have to follow a rainbow order. Repeating two or three shades across both hands can create a more coordinated result, while five different colors give the set a playful look.
4. Milky Nude Pearl Nails
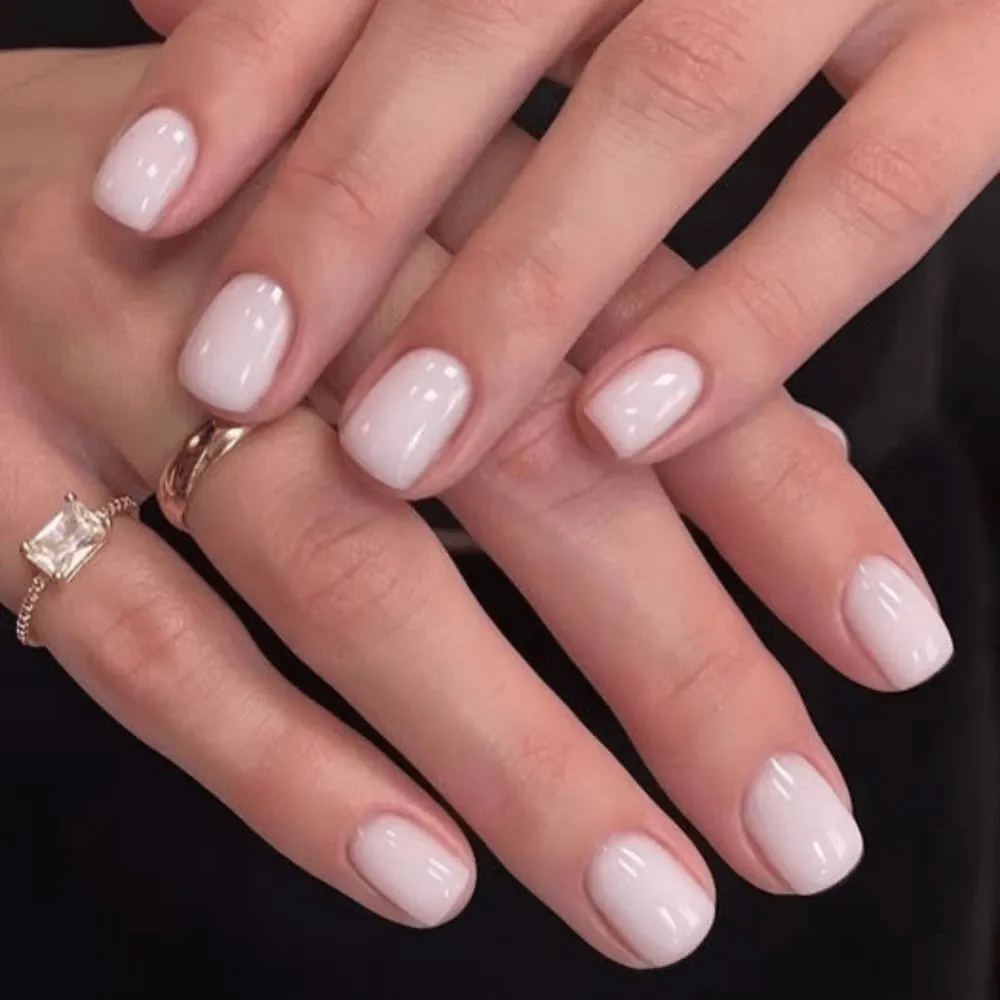
Milky nude nails have a softened, semi-opaque base rather than a completely transparent finish. Adding a delicate pearly sheen gives the color some movement when the hands catch the light.
Unlike strong mirror chrome, the reflection here should stay subtle. Short rounded nails keep the look understated, while a slightly longer almond shape gives the pearly finish more visible surface.
Tiny Hearts, Dots & Minimal Details
Small accents can change the character of a manicure without covering the entire nail. The placement of a heart, dot, or star often matters as much as its color.
5. Mini Red Heart Nails
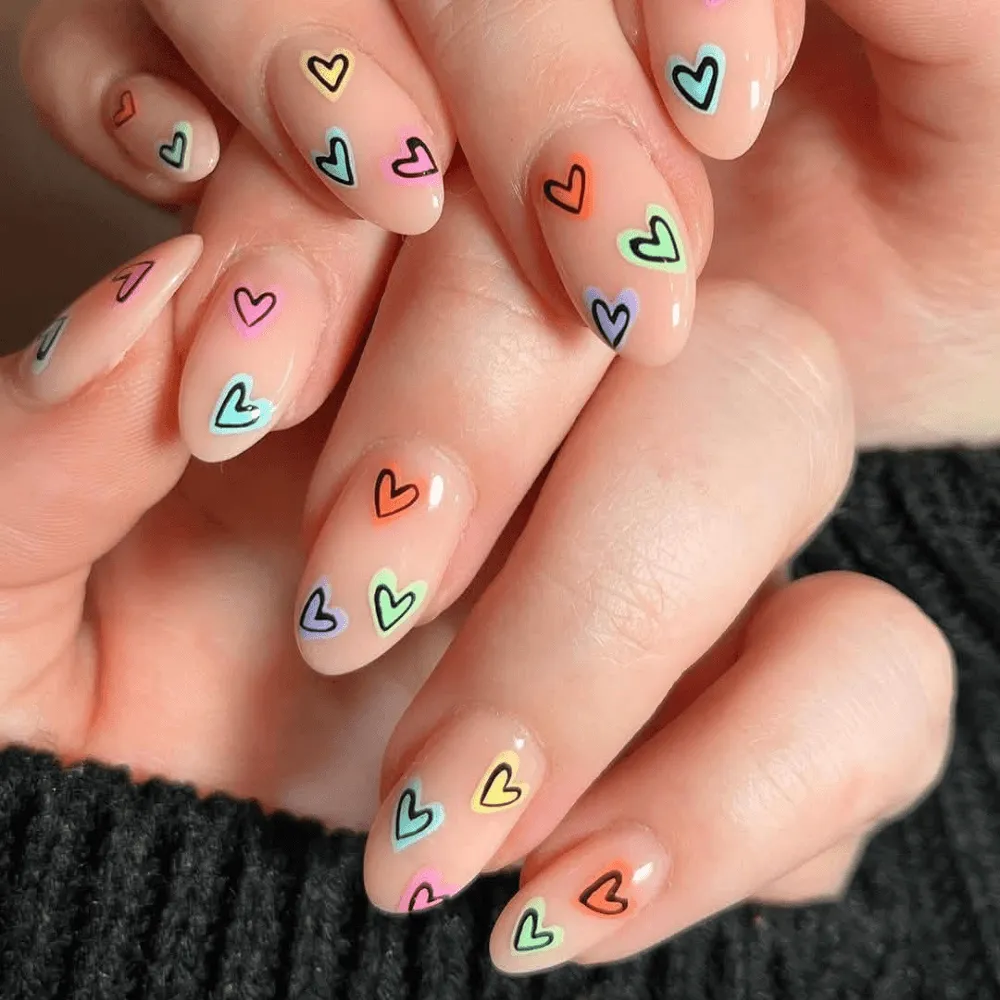
One little red heart against a sheer pink base is enough to make a simple manicure feel romantic. Place the heart near the cuticle for a delicate detail or closer to the center when you want it to stand out.
The heart doesn’t have to appear on every nail. Two accent nails surrounded by plain pink polish create a quieter version that’s also suitable for shorter lengths.
6. Retro Polka-Dot Nails
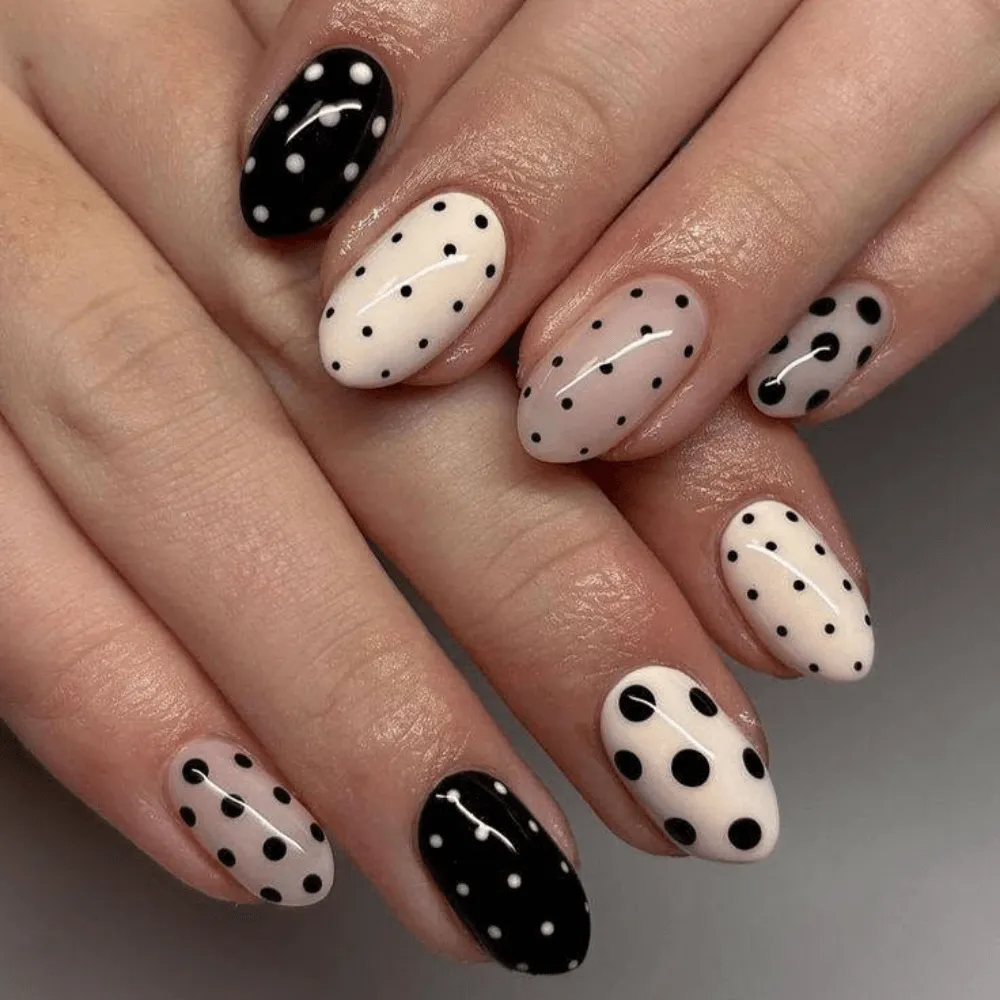
Small dots bring a retro feel to an otherwise plain set. Red dots on cream look different from black dots on baby pink, even when the pattern is identical.
Spacing determines the overall effect. Evenly arranged dots create a tidy pattern, while scattered dots feel more playful. On very short nails, leaving a little background visible between dots prevents the design from becoming crowded.
A dotting tool helps create consistent circles, although a carefully used rounded tool can work with regular polish.
7. Tiny Gold Star Nails
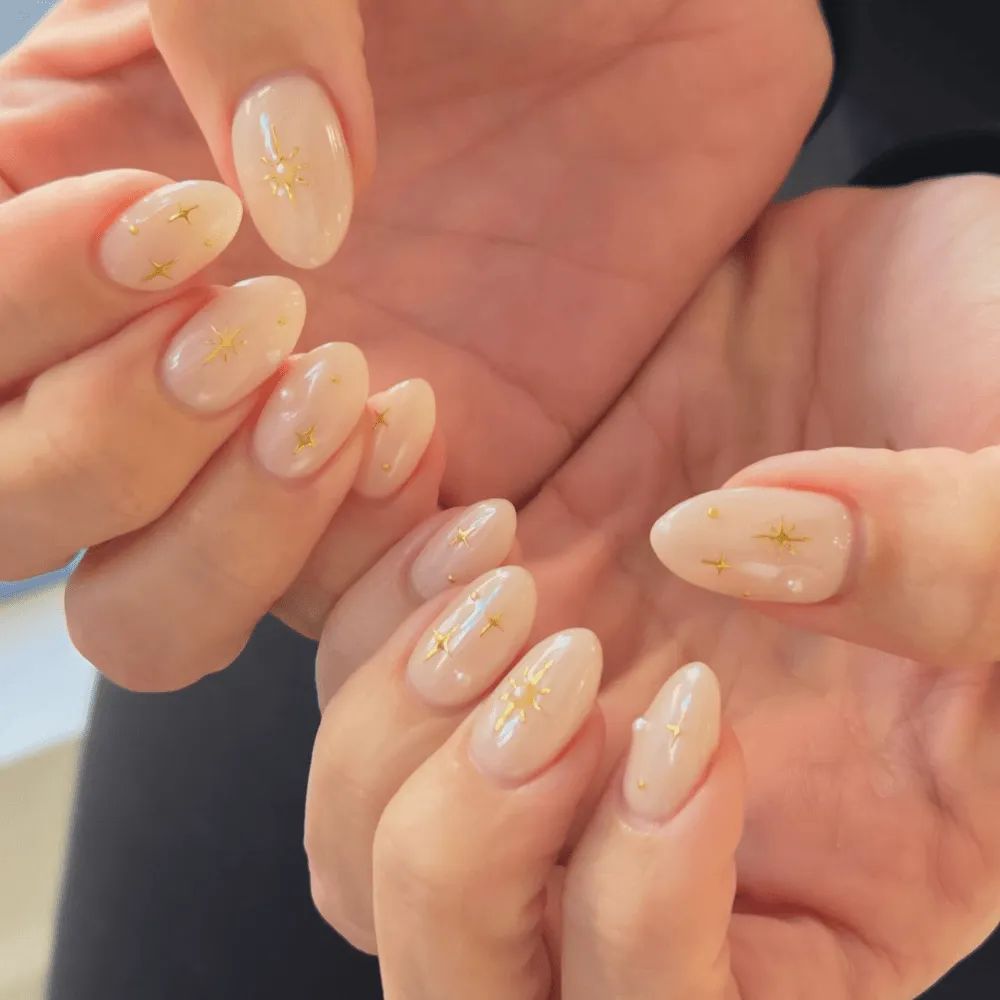
A tiny metallic star near the cuticle gives nude or sheer pink polish a small reflective detail. The gold catches light without needing glitter across the entire nail.
You can place one star on each hand or use several small stars across selected nails. Flat metallic decals are useful when you want a clean star shape without hand-painting each point.
8. Single Accent-Motif Nails
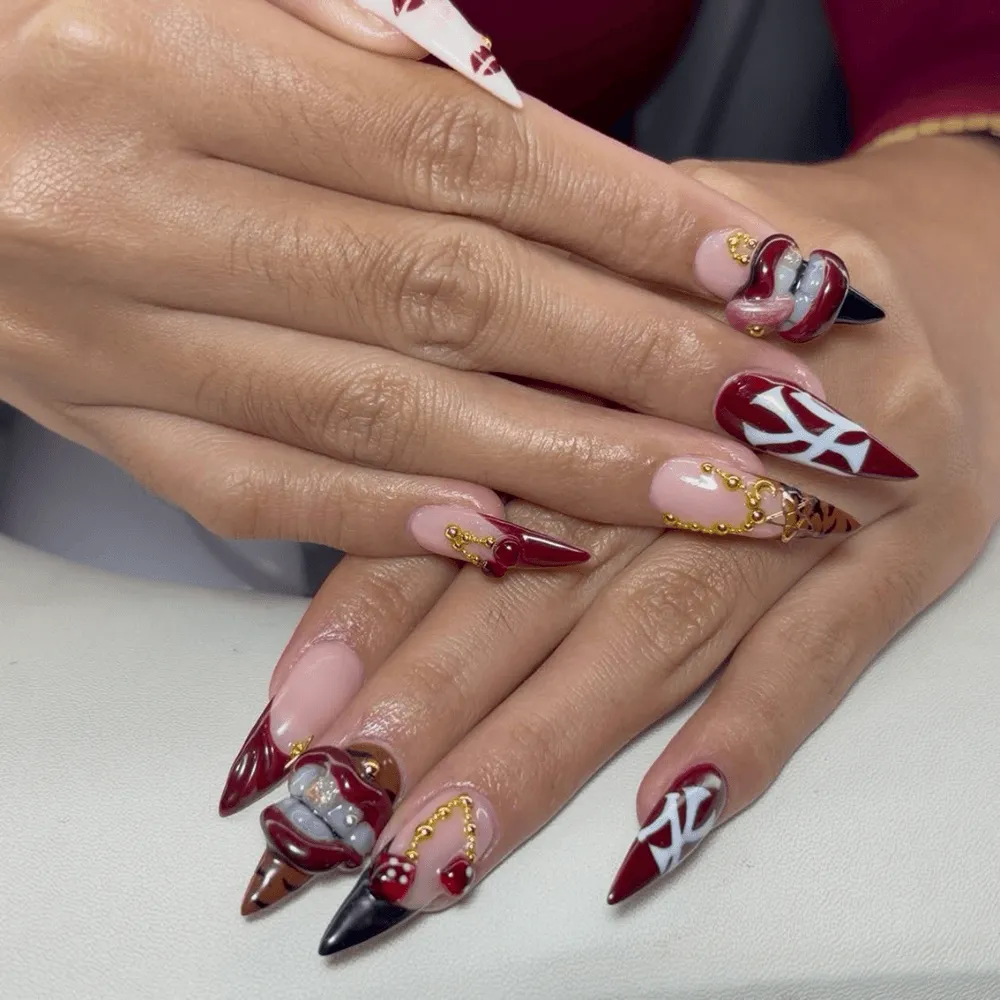
An accent manicure keeps most nails in one color and reserves the artwork for a single finger on each hand.
For example, a pale lavender set could feature one tiny white squiggle on each ring finger. The remaining nails stay plain, making the small illustration the focus.
This works particularly well when you love decorative nail art but don’t want the same pattern repeated across all ten fingers.
Cute Flower, Fruit & Nature Nails
Flowers, fruit, and miniature nature details give nail art recognizable shapes and colors. Some work as tiny accents, while others become the main feature of the manicure.
9. Tiny Daisy Nails
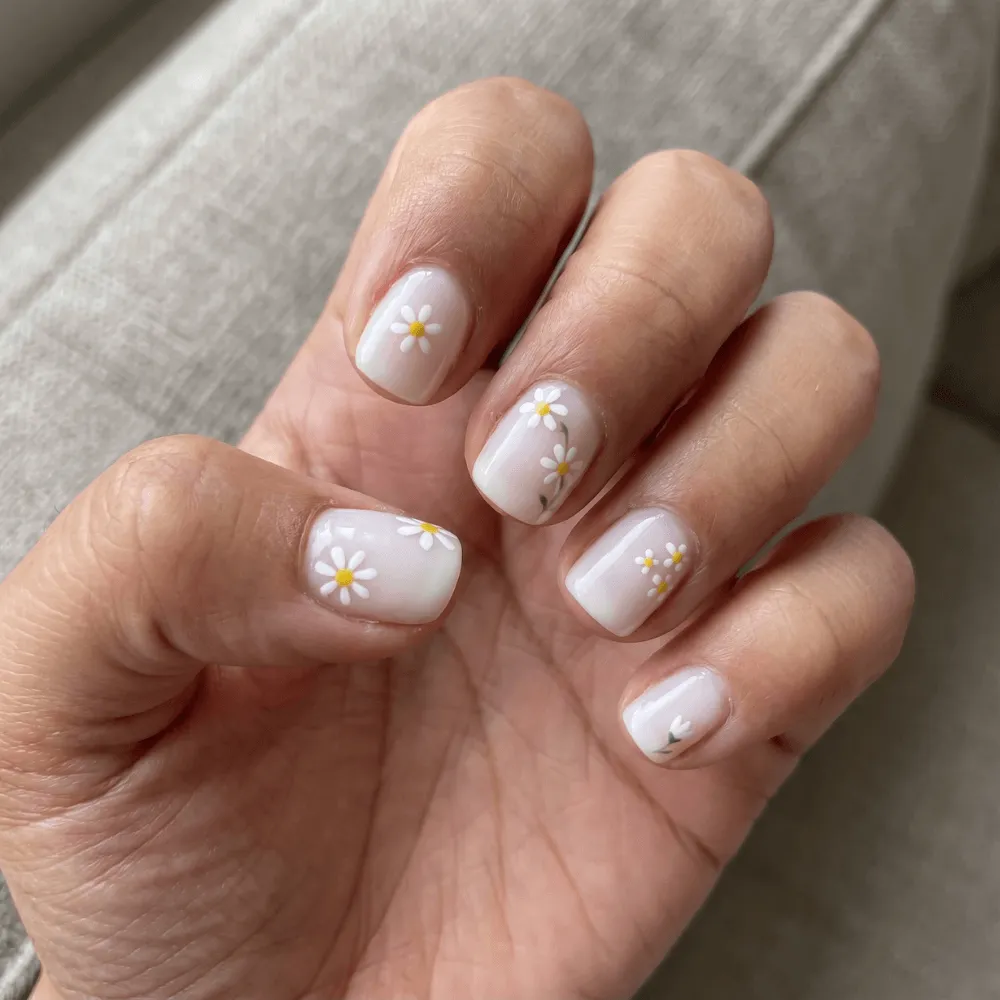
White daisies with yellow centers stand out against soft blue, pale pink, or transparent bases. A single flower near one corner looks different from a row of daisies following the nail tip.
Keep the petals small if you’re working with short nails. A larger flower can also work beautifully, but it becomes the main design rather than a delicate accent.
Simple dot-style daisies can be made with a dotting tool; fine, individually painted petals require more control.
10. Cherry Accent Nails
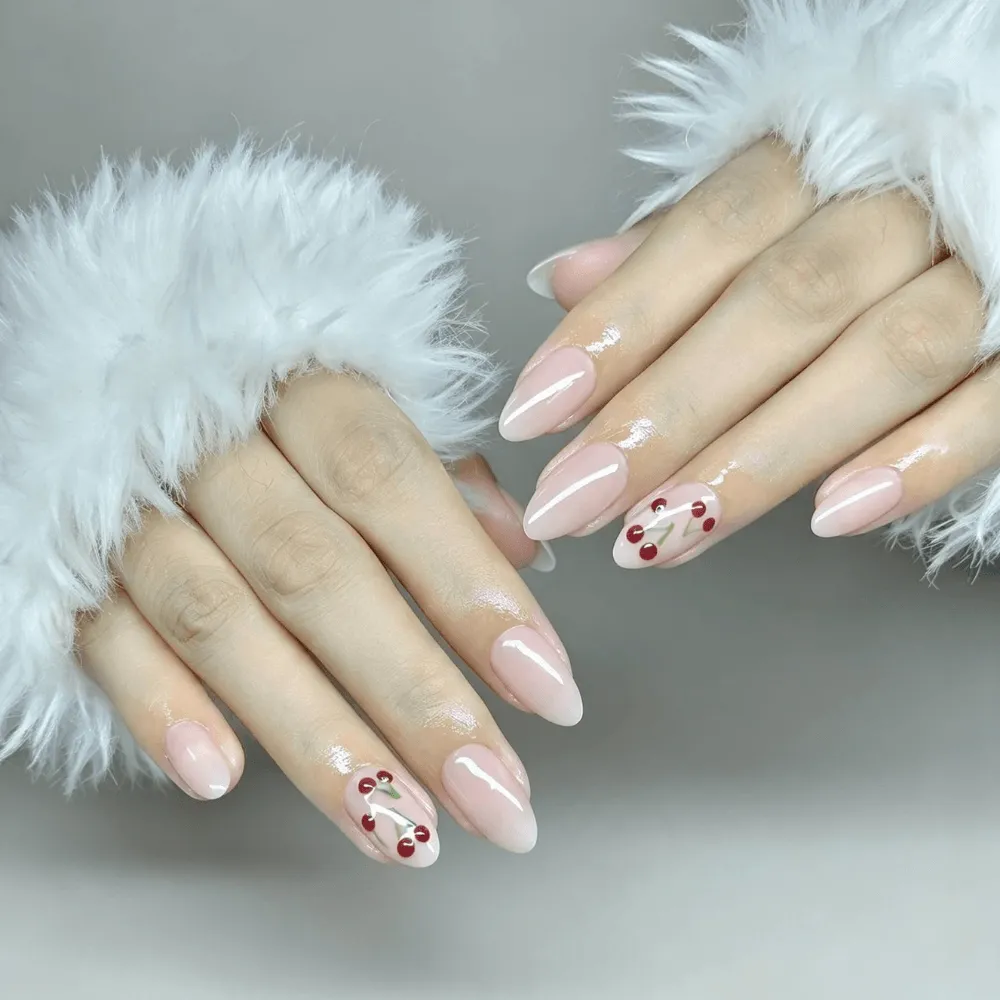
Two small red cherries connected by thin green stems bring a recognizable fruit motif to the manicure. A milky-white or pale-pink background keeps the red fruit visible.
Cherry art is especially effective on accent nails. You could use one cherry cluster on each ring finger and repeat the red shade on a few plain nails.
For a different arrangement, place tiny cherries near the tip instead of the center. That gives the design a French-inspired appearance without painting a traditional tip line.
11. Strawberry Nail Art
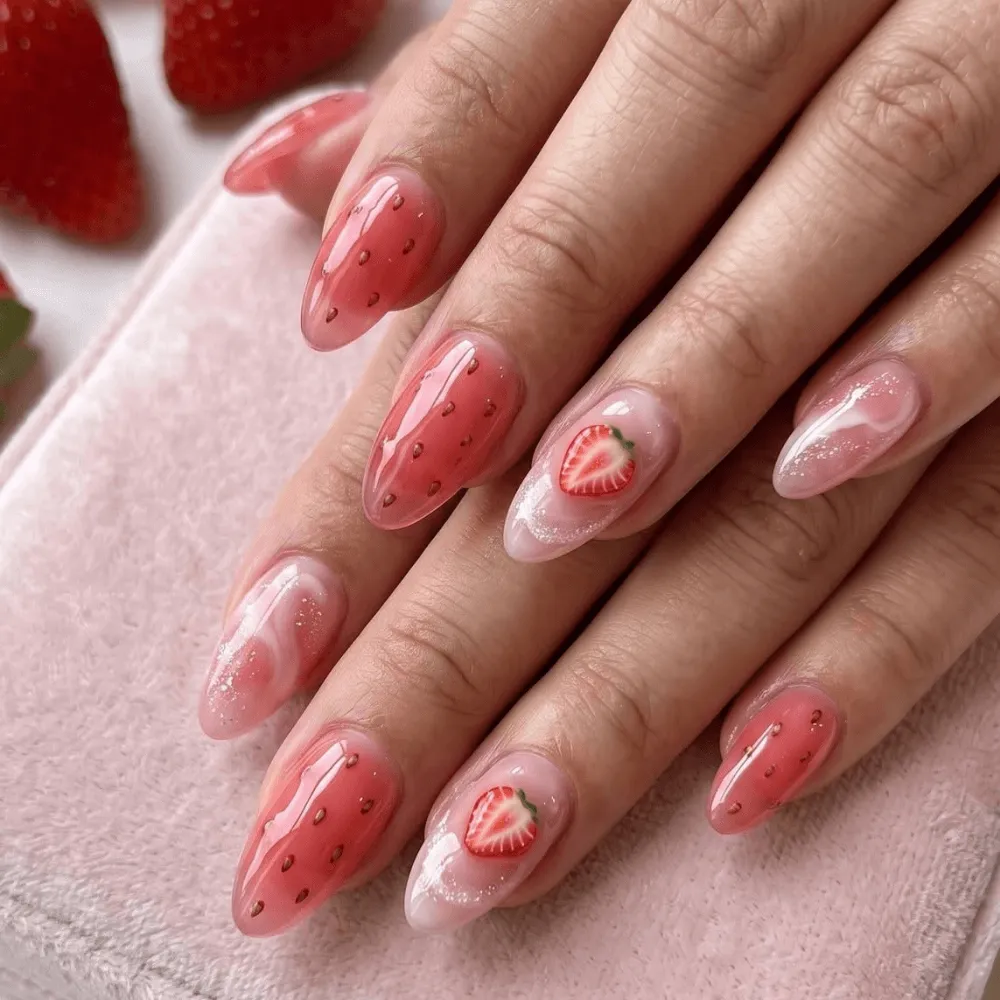
Strawberry nails have more detail than a simple red accent. The green leaves, tiny seeds, and rounded fruit shape help distinguish a strawberry from other fruit motifs.
One approach uses miniature strawberries over a neutral base. Another turns the tip of the nail into a strawberry using red polish, small seed marks, and green details.
The second version needs enough room for the fruit shape to remain recognizable, so the size of the artwork matters more than having long nails.
12. Ladybug Accent Nails
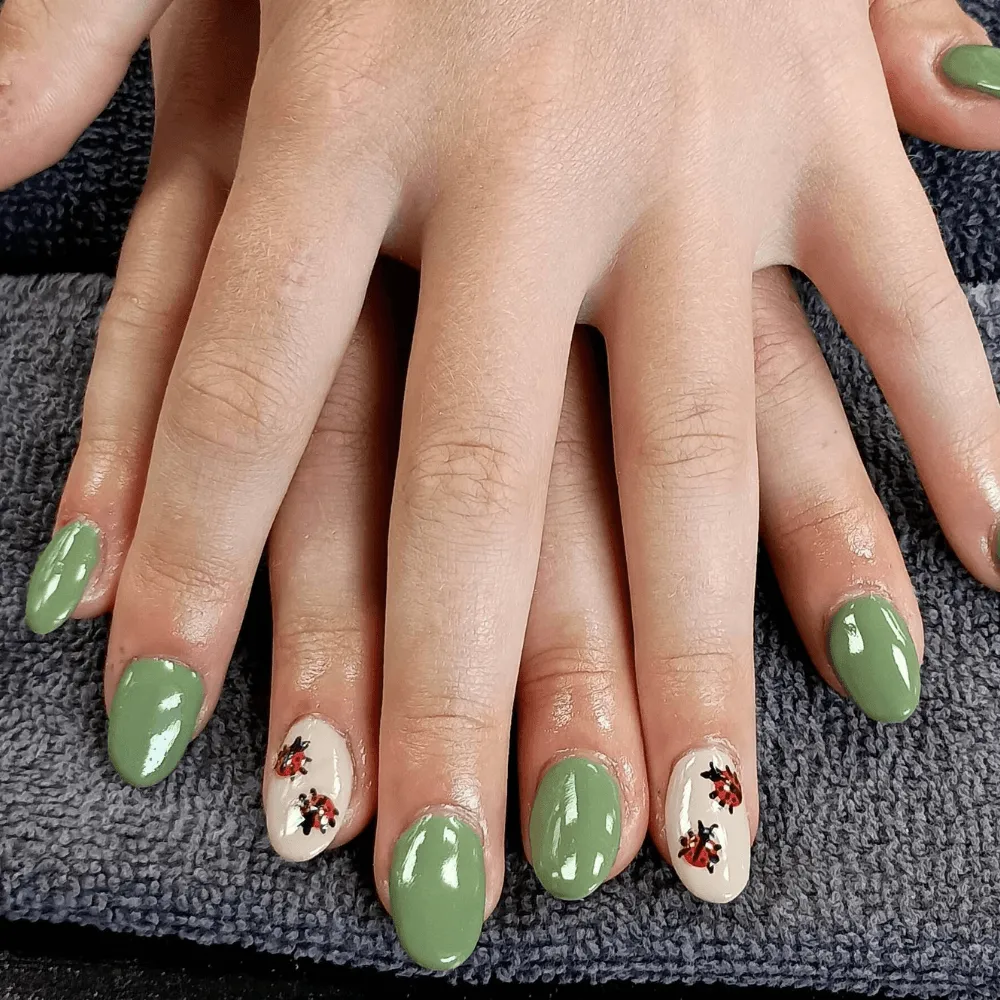
A red ladybug with black spots makes a small, graphic accent against cream, pale green, or soft pink polish.
The contrast between the red body and black markings is what makes the illustration recognizable. One ladybug on each hand can be enough, especially when the surrounding nails use a coordinating solid shade.
For short nails, keep the body simple instead of adding too many tiny details that disappear at normal viewing distance.
13. Butterfly Accent Nails
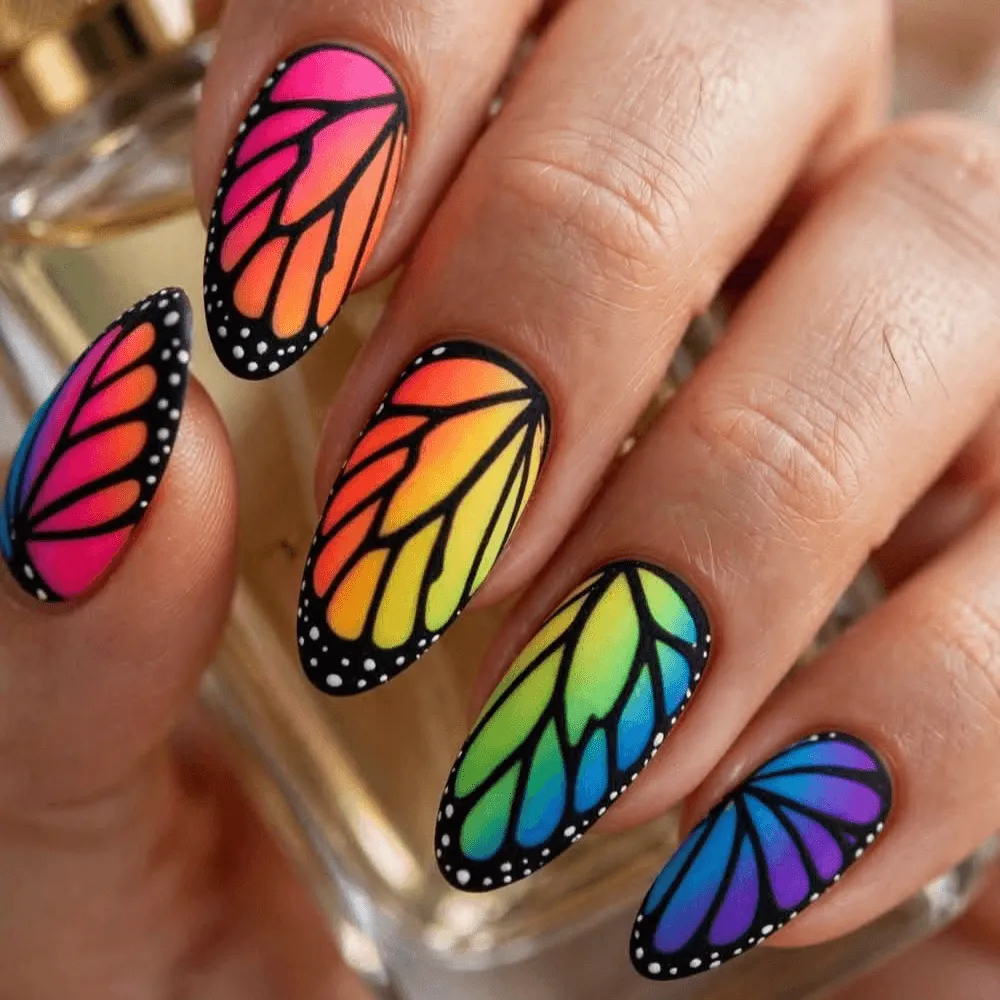
Butterfly nails can look completely different depending on whether the artwork shows a full butterfly or only a section of its wings.
A small lavender butterfly on a sheer base creates a delicate accent. A larger wing design extending across the nail gives the manicure more detail and contrast.
Fine outlines and symmetrical patterns make this one more demanding to paint by hand. A well-made decal can reproduce detailed wing artwork without needing the same level of brush control.
Cute French Tip Nails
French tips offer plenty of room for small changes. Switching the edge color, adjusting its thickness, or adding a tiny motif can turn a familiar manicure into something playful.
14. Pastel Micro-French Nails
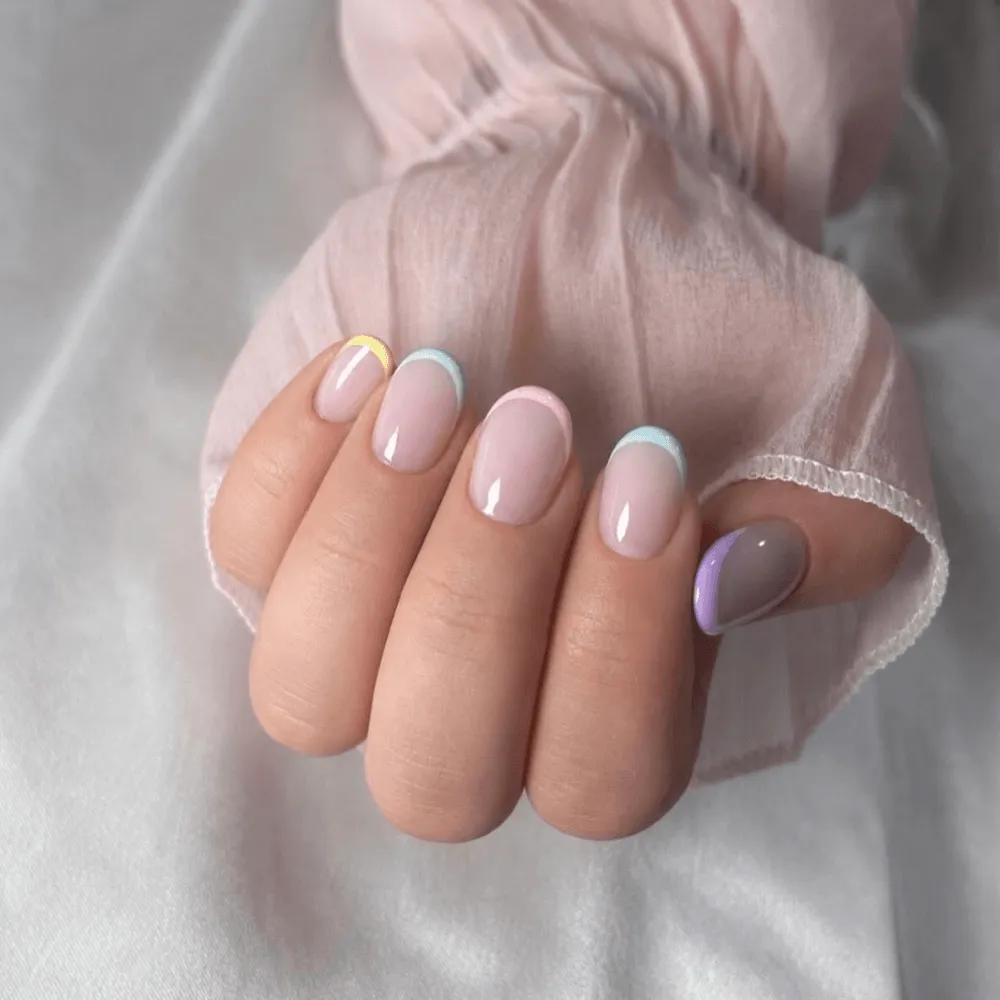
Micro-French nails use a narrow line of color along the free edge instead of a wide tip.
Try pale yellow, mint, lavender, or baby blue over a sheer nude base. The thin line leaves most of the natural-looking base visible, which makes the design practical to adapt to shorter nails.
The important detail is the line’s thickness. A wider pastel edge produces a different look, so ask for a micro-French specifically when you want that fine outline.
15. Polka-Dot French Tips
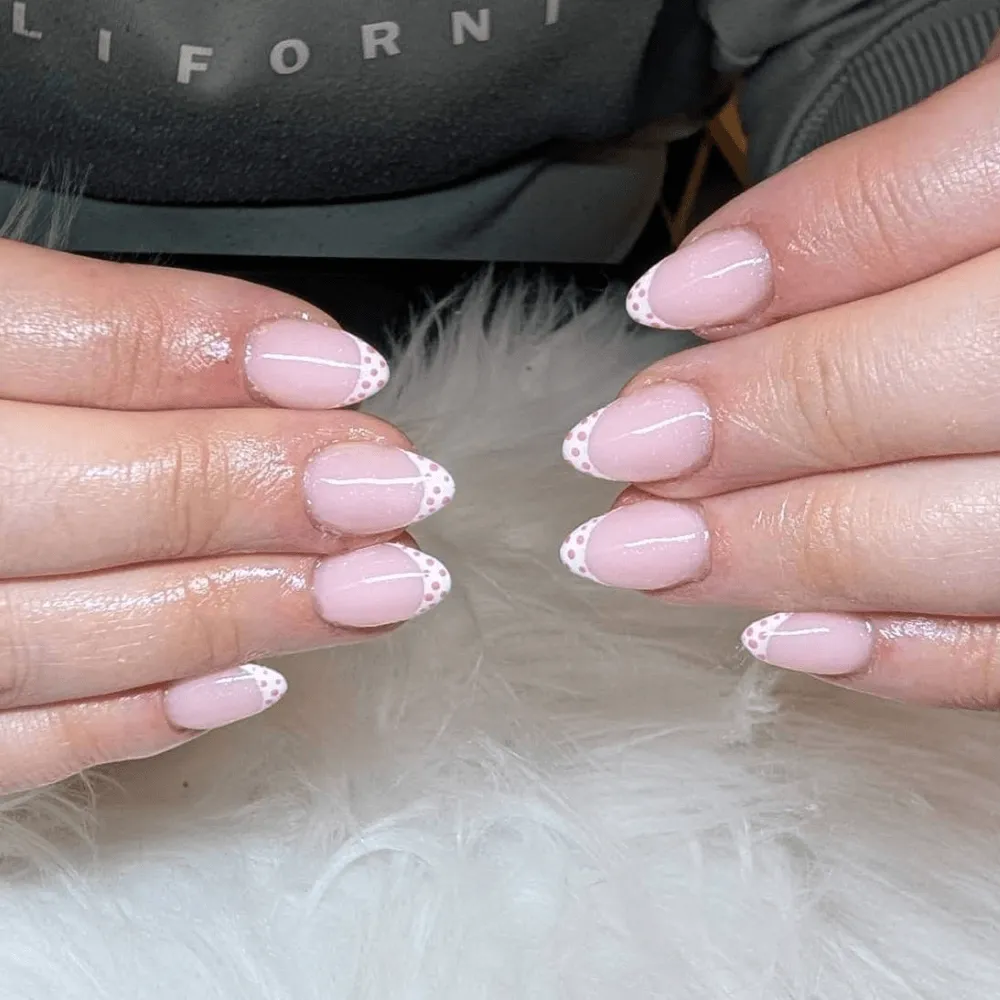
Polka-dot French tips combine two familiar patterns. The dots can sit inside a colored tip, follow its curved edge, or appear just above the smile line.
Black dots on white tips create a sharper contrast. Pastel dots over a soft pink tip give the design a gentler color combination.
For a neat result, the dots should follow the tip’s shape rather than appear randomly across the entire nail.
16. Heart French Tips
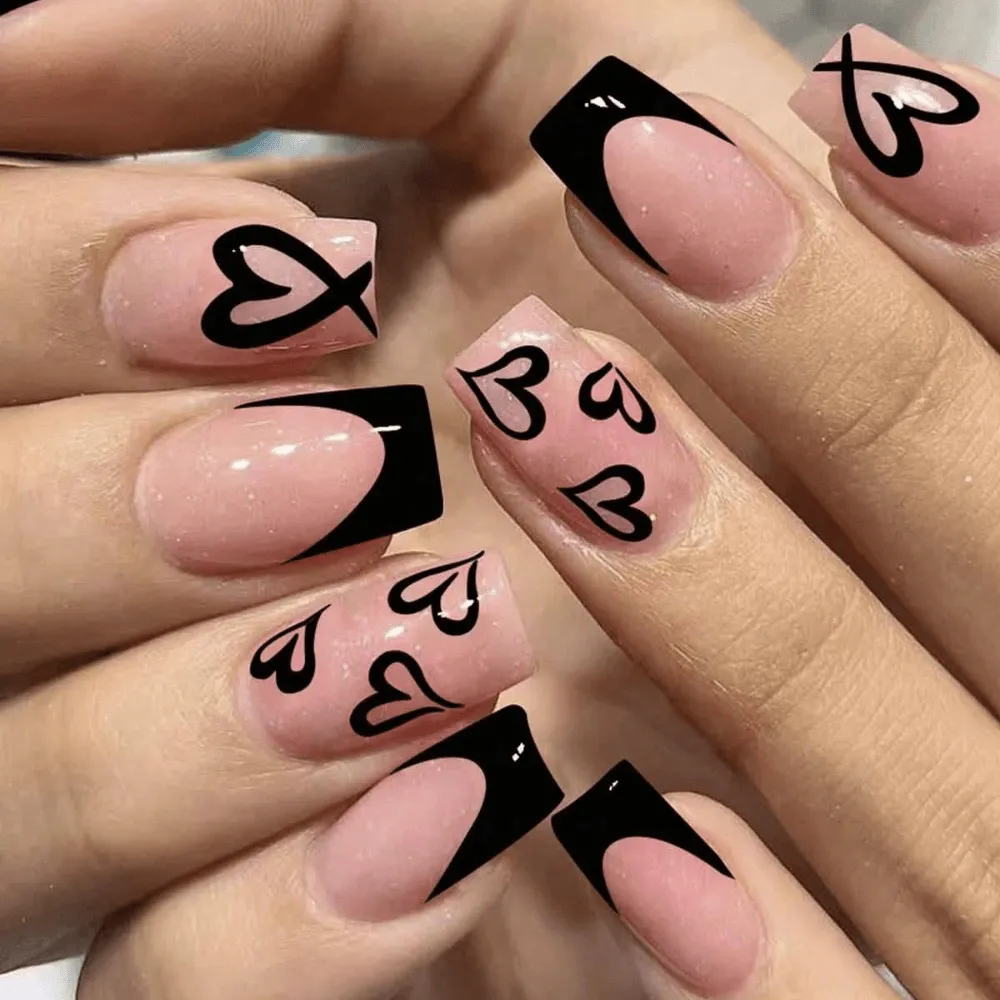
A heart French manicure uses the tip area to create or frame a heart.
Some designs form a rounded heart shape with the two sides of the French tip. Others keep a conventional tip and add miniature hearts along the edge.
These are different looks, so the reference photo matters. Decide whether you want the tip itself to form the heart or simply have heart decorations before asking your nail technician.
17. Mini Floral French Tips
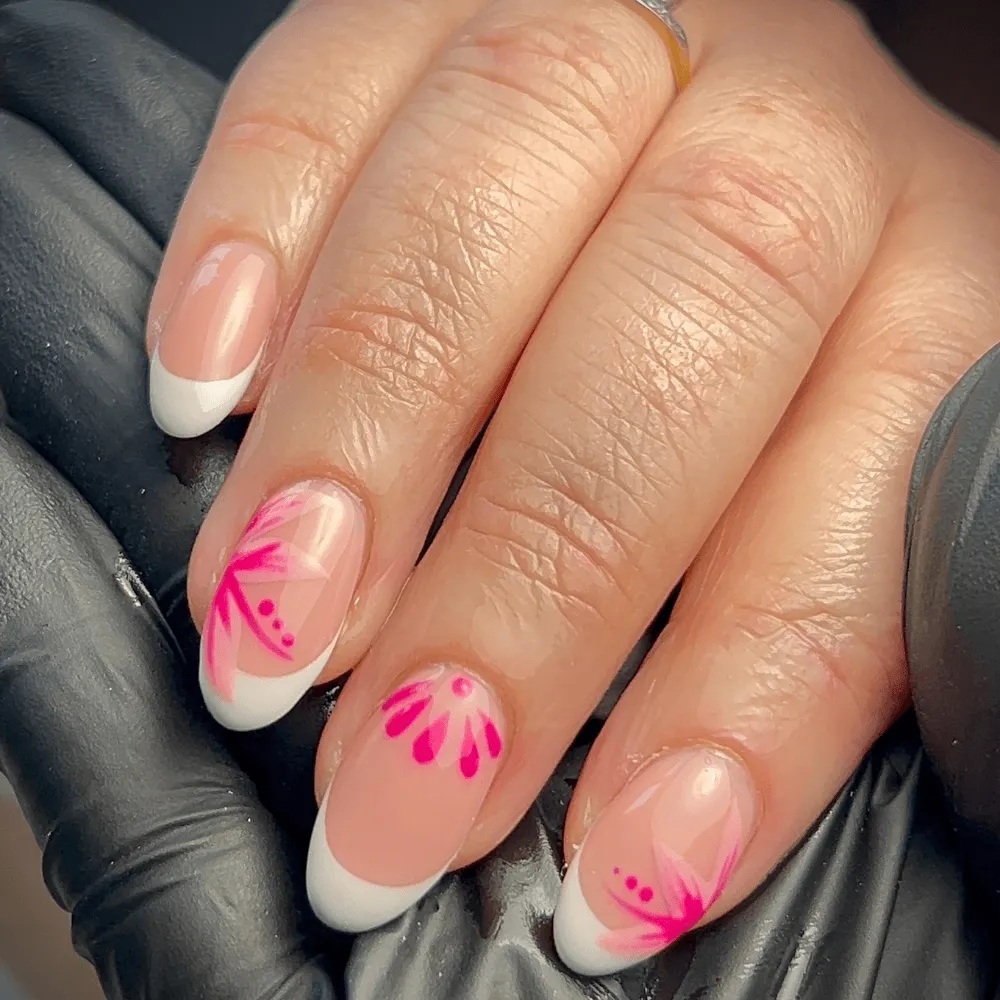
Tiny flowers placed along a French tip can soften a clean manicure without covering the nail bed.
White daisies over lavender tips make the floral details stand out, while pale-pink flowers along a white edge create a subtler result.
The flowers can follow the entire tip or appear at one corner. Corner placement is useful when you want the design to remain recognizable on shorter nails.
Bow, Ribbon & Coquette Nails
Bows, ribbons, and pearl details give these manicures a romantic, decorative style. Painted designs are usually flatter, while attached or sculpted accents create a more dimensional appearance.
18. Hand-Painted Bow Nails
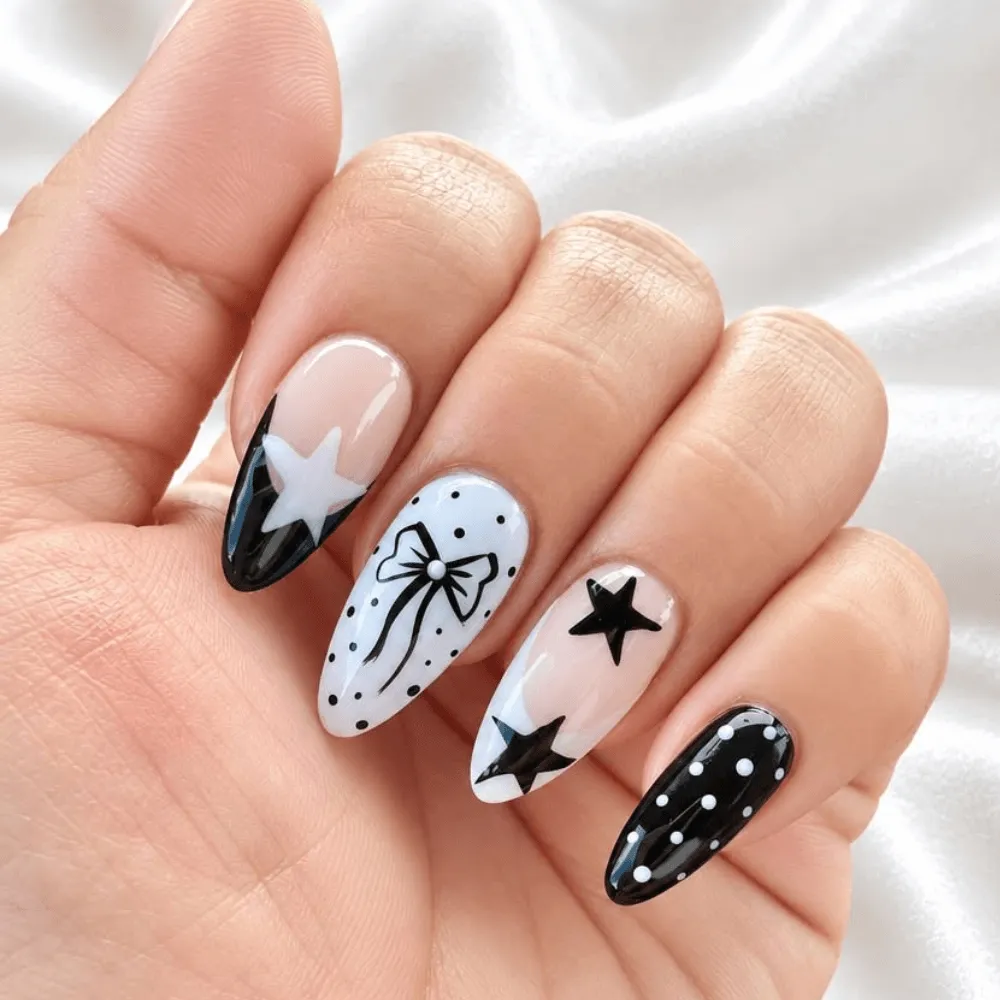
A white bow painted over a blush-pink base has a delicate look without needing an attached charm.
The loops and trailing ribbon ends should remain clearly separated. On small nails, a simple bow outline may read more clearly than one packed with tiny shading details.
Place a single bow near the cuticle or on an accent nail. Repeating it on every finger creates a noticeably more decorative set.
19. Pearl Accent Nails
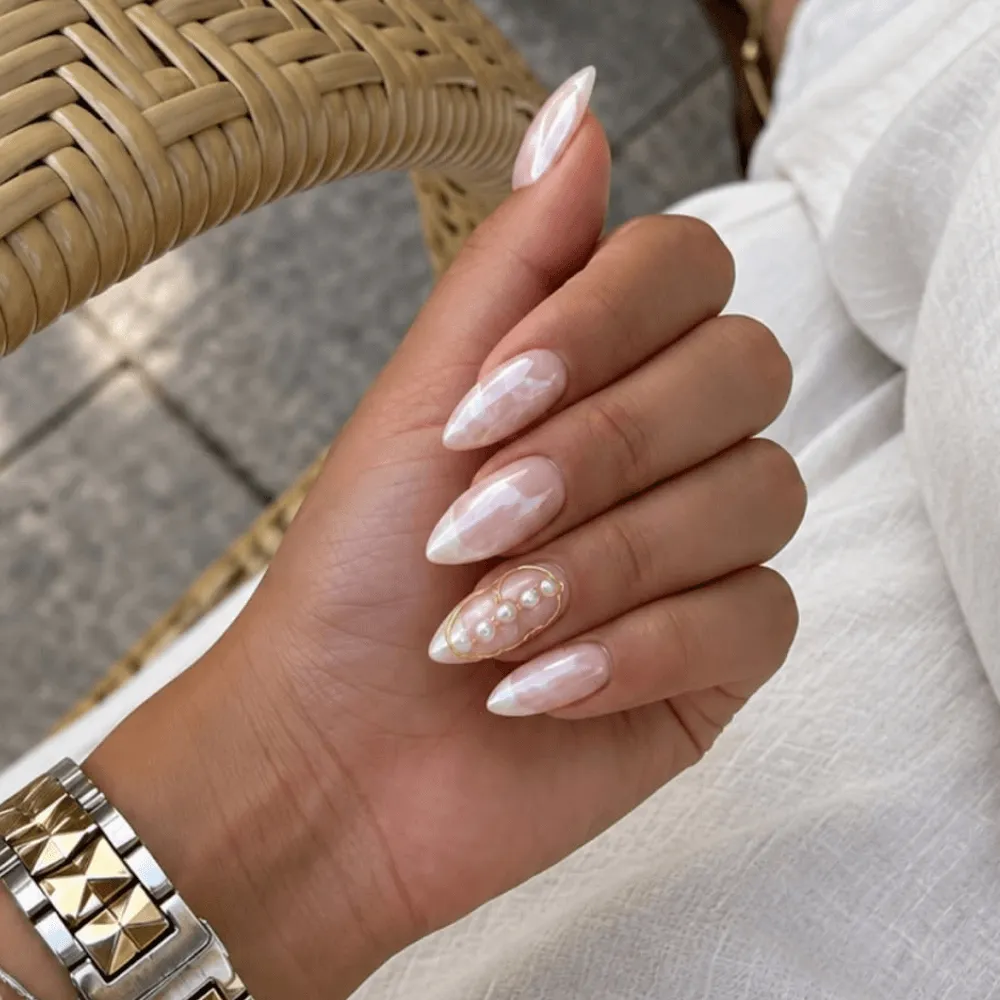
Tiny pearls give a manicure texture without requiring elaborate illustrations.
A single pearl near the cuticle creates a restrained detail, while several pearls arranged along a French tip make the design more decorative.
Pearls can also be combined with painted bows, but the arrangement needs enough open space for both details to remain visible. Raised embellishments can catch on fabrics, so consider that before choosing a heavily decorated set.
20. Mini 3D Bow Nails
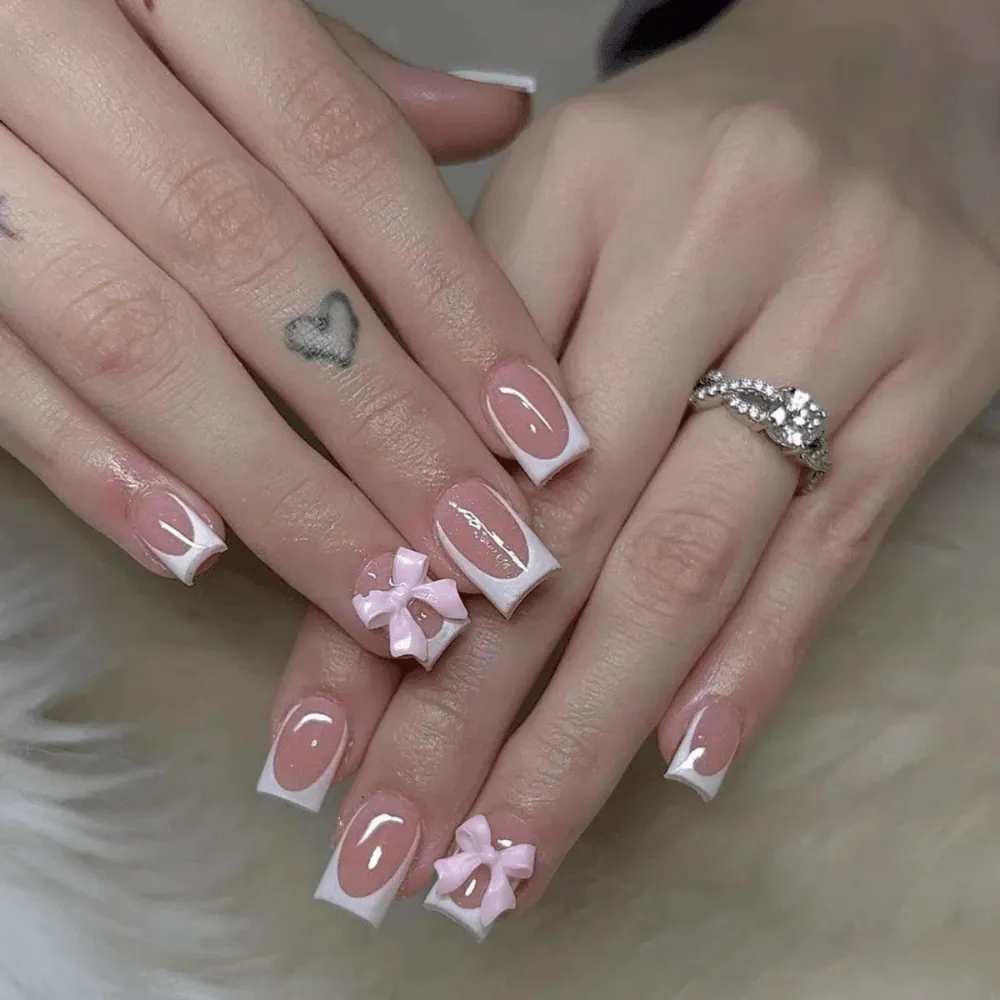
A raised bow creates a different effect from a painted ribbon because its loops sit above the nail surface.
A miniature white bow on a glossy pink nail can become the main feature of an otherwise simple manicure. Using one or two bows instead of ten keeps attention on the sculptural detail.
Confirm the size and height of the bow with your nail technician. A tiny, low-profile accent and a large raised decoration may look similar in close-up photographs but feel very different during everyday activities.
21. Pink-and-White Ribbon Nails
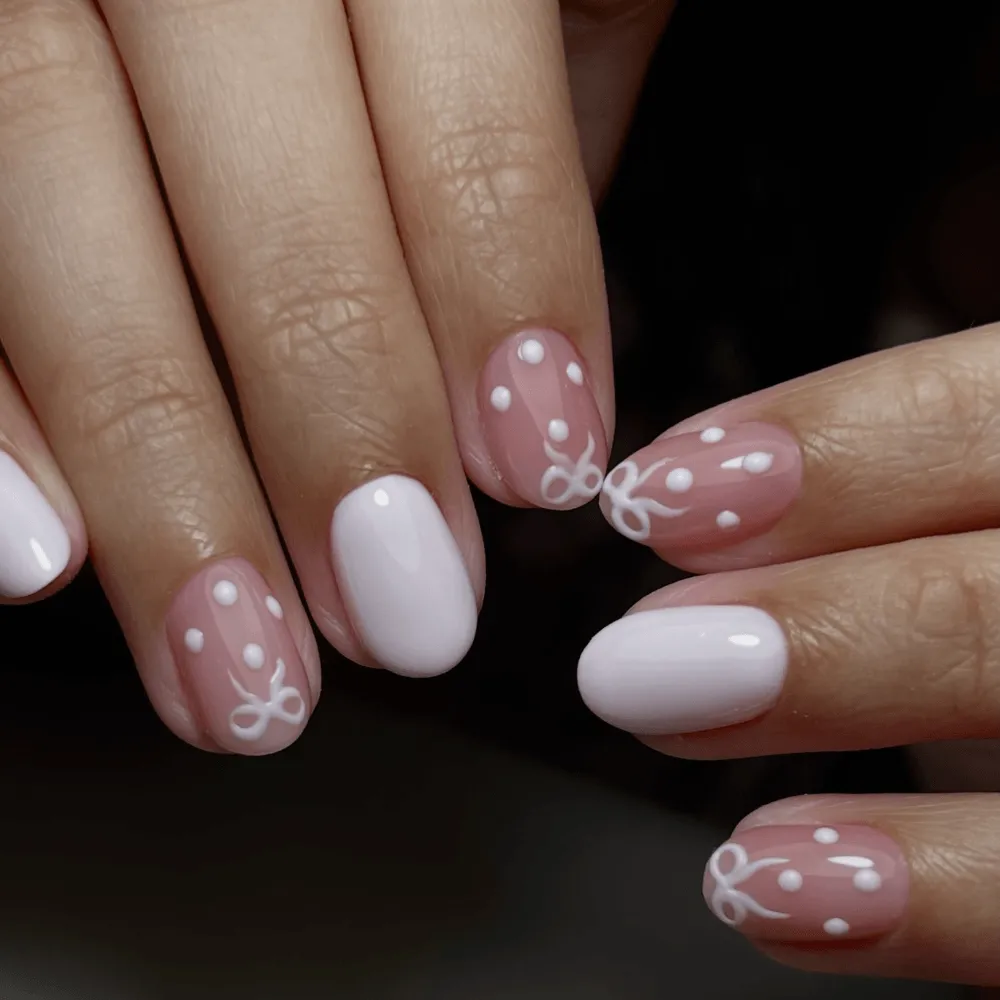
Ribbon nail art uses thin lines, loops, or crossing bands to create the appearance of fabric wrapped around a nail.
Soft pink and white keep the design delicate. A ribbon crossing the nail diagonally looks different from a centered gift-wrap pattern, so line placement matters.
This style works especially well when a few nails carry the full ribbon artwork and the remaining nails use matching plain polish.
Colorful, Retro & Mix-and-Match Nails
These designs rely on brighter color combinations, repeated patterns, or graphic shapes. The trick is to make each element readable instead of letting several bold patterns compete.
22. Pink-and-Orange Swirl Nails
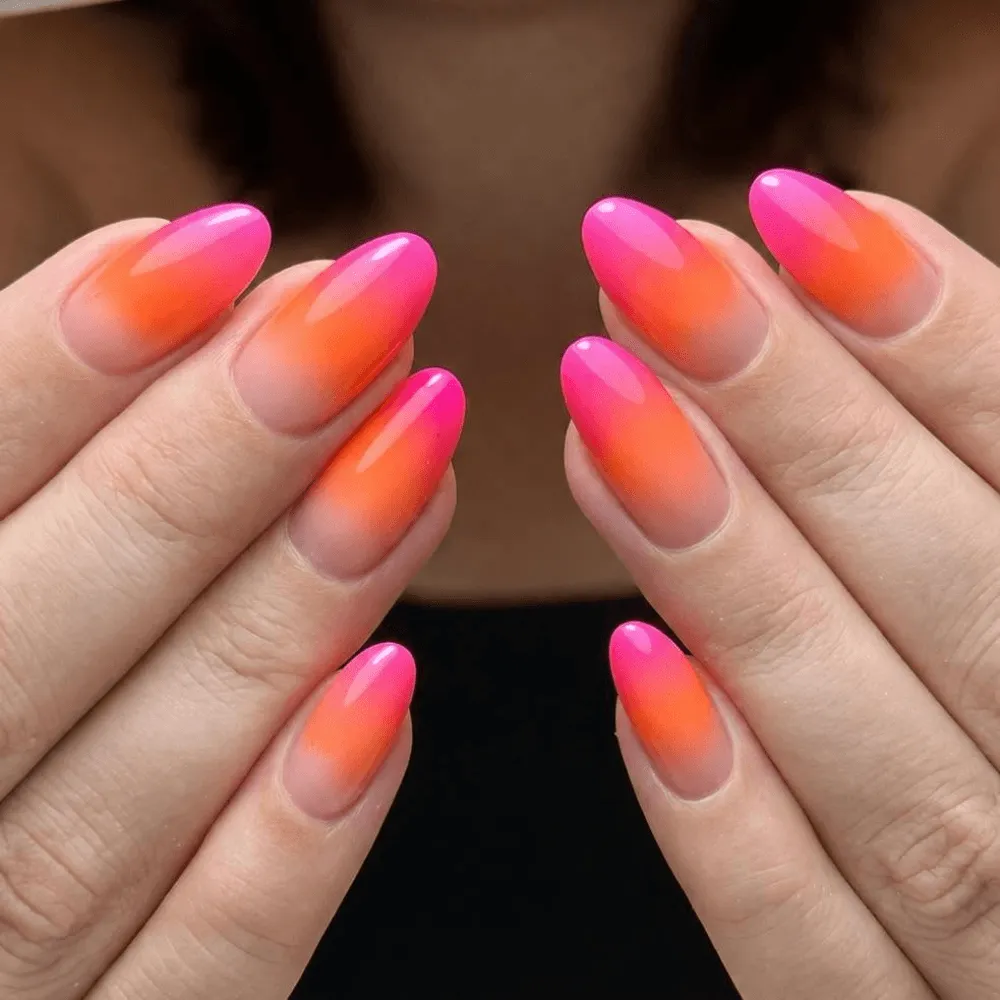
Curved pink and orange lines give nails a warm, retro appearance. Add cream or a sheer base between the colors to keep the swirls distinct.
The design can use broad curves across the entire nail or smaller waves concentrated near the tips.
Larger swirls need more visible nail surface, but a simplified two-color curve can also work on short nails. Keep the line thickness consistent when you want the full set to look coordinated.
23. Pastel Checkerboard Tips
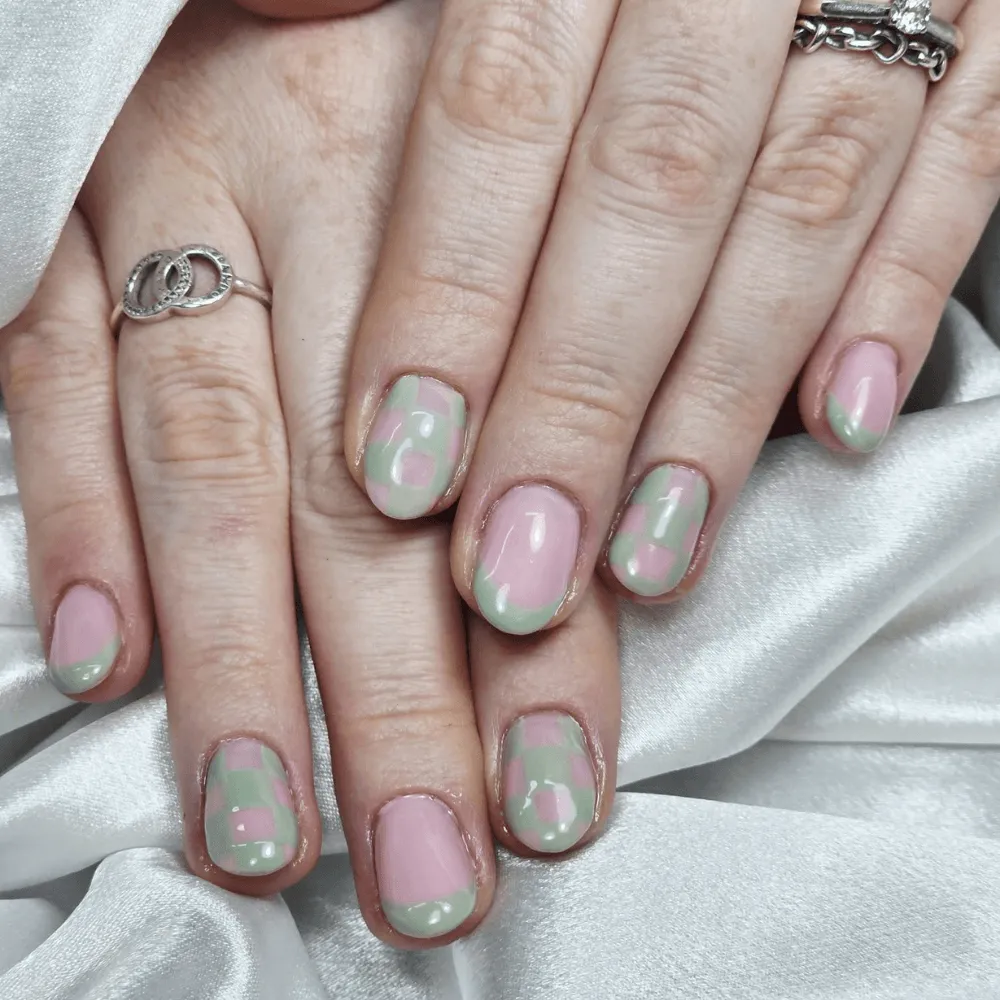
Checkerboard French tips use small alternating squares along the nail edge, leaving the rest of the nail relatively clear.
Lavender and white create a softer version of the classic high-contrast pattern. Pink-and-cream checks offer another option.
The individual squares need enough space to remain recognizable. On very short nails, reducing the pattern to one small checkered accent may work better than squeezing several rows into a narrow tip.
24. Yellow Smiley-Face Nails
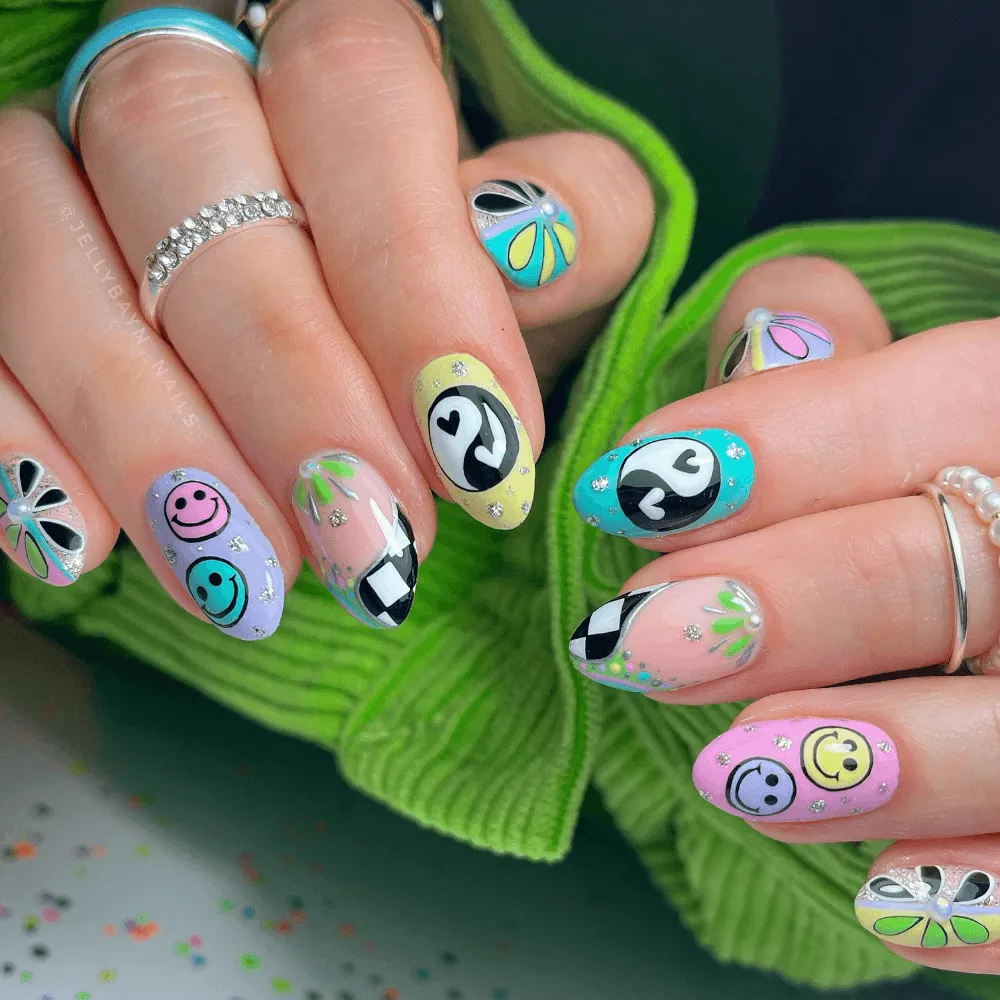
A small yellow smiley face adds a playful illustration to a nude, pale-blue, or soft-pink manicure.
The expression needs only a few details, but the eyes and curved mouth should be placed carefully so the face remains clear.
You can use one smiley as an accent or scatter several across the set. Pairing the artwork with plain yellow nails is another way to coordinate the colors without repeating the illustration on every finger.
25. Pastel Cow-Print Nails
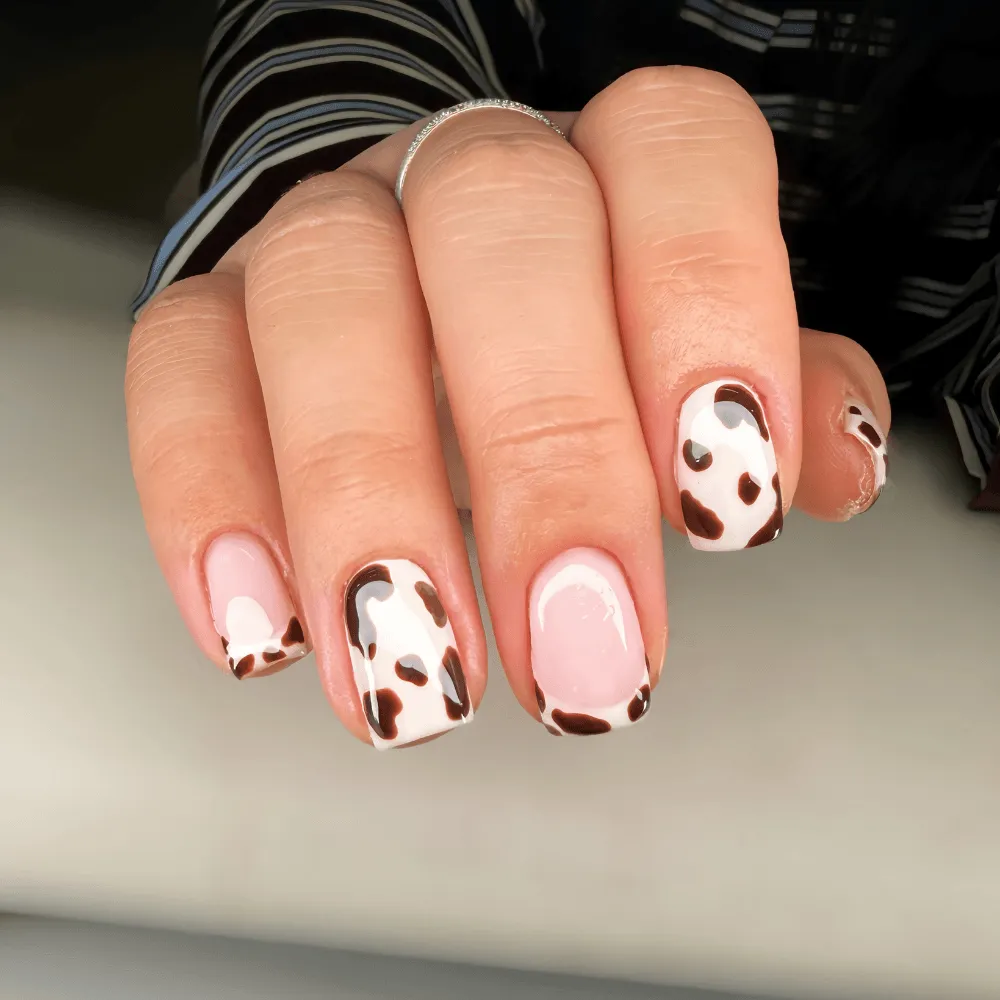
Cow-print nails use irregular patches rather than evenly spaced dots. Changing the traditional black-and-white pattern to lavender, pale blue, or soft pink makes it feel more playful.
A few patches on white French tips create a smaller graphic detail. Covering an entire accent nail produces a bolder effect.
Keep the patches uneven in shape but distinct enough to read as cow print, especially when using two pale colors with limited contrast.
Kawaii & 3D Cute Nails
Kawaii-inspired nail art often uses miniature faces, animals, whimsical illustrations, and sweet decorative details. Some designs are painted flat, while others involve sculpted or attached elements.
26. Mini Animal-Face Nails
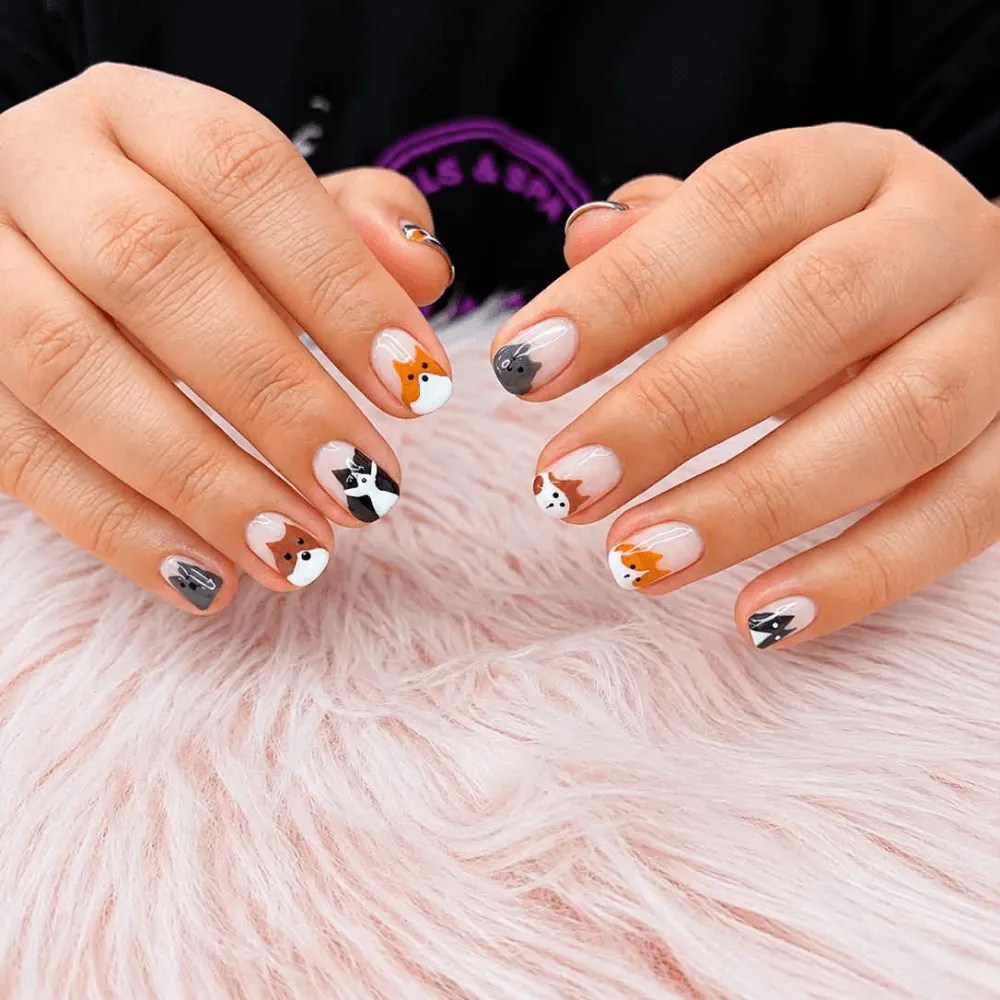
Tiny animal faces can be built from a few recognizable features: rounded ears, small eyes, a nose, and a simple mouth.
A bear or bunny face painted on one nail gives a manicure character without requiring a full illustrated scene on every finger.
The base color helps define the animal. Cream, tan, and soft pink work for gentle palettes, while contrasting outlines make small facial details easier to see.
27. Cloud-and-Star Nails
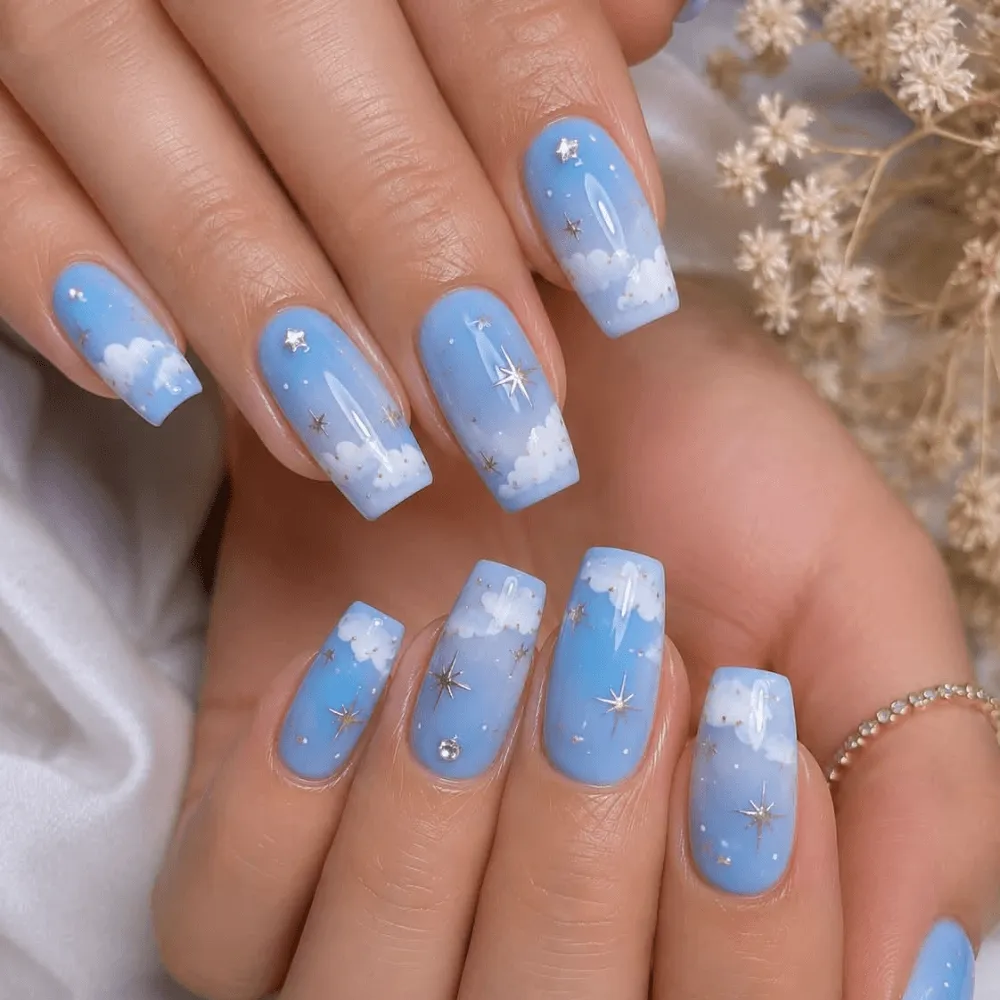
Soft white clouds against baby blue create a dreamy base for tiny stars or sparkles.
The clouds can float across a few nails while the remaining fingers use plain blue or sheer polish. That arrangement keeps the illustrations separate enough to appreciate.
Cloud shapes have soft, uneven edges, unlike the sharp points of stars. Keeping those differences visible gives the design more depth than covering every nail with identical white marks.
28. Sculpted 3D Daisy Nails
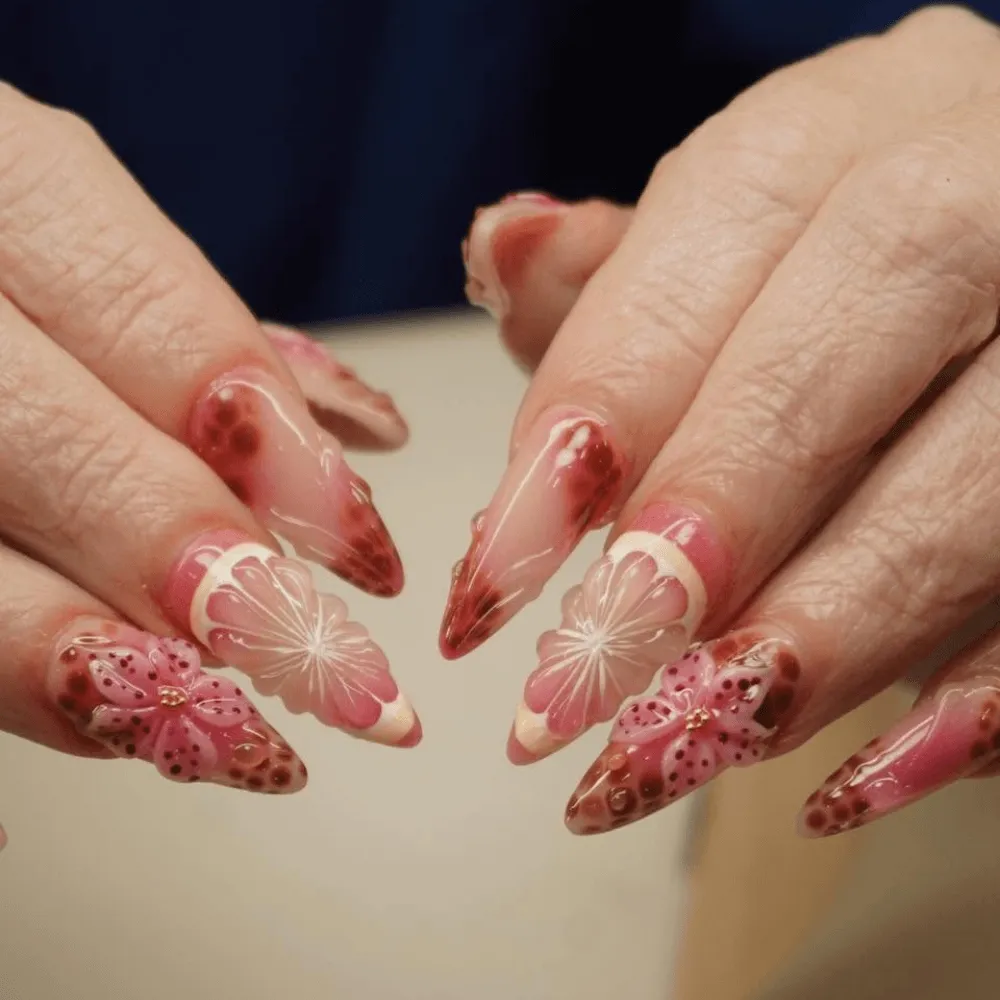
Raised daisy petals create visible texture above the nail surface. They catch light differently from flat painted flowers and can make even a single accent nail stand out.
A small white daisy with a yellow center works against pale pink, lavender, or baby blue.
The flower’s height and size matter. Large sculpted petals may be less convenient for someone who frequently wears gloves or works with their hands, so discuss the design’s profile before choosing it.
29. Playful Character-Inspired Nails
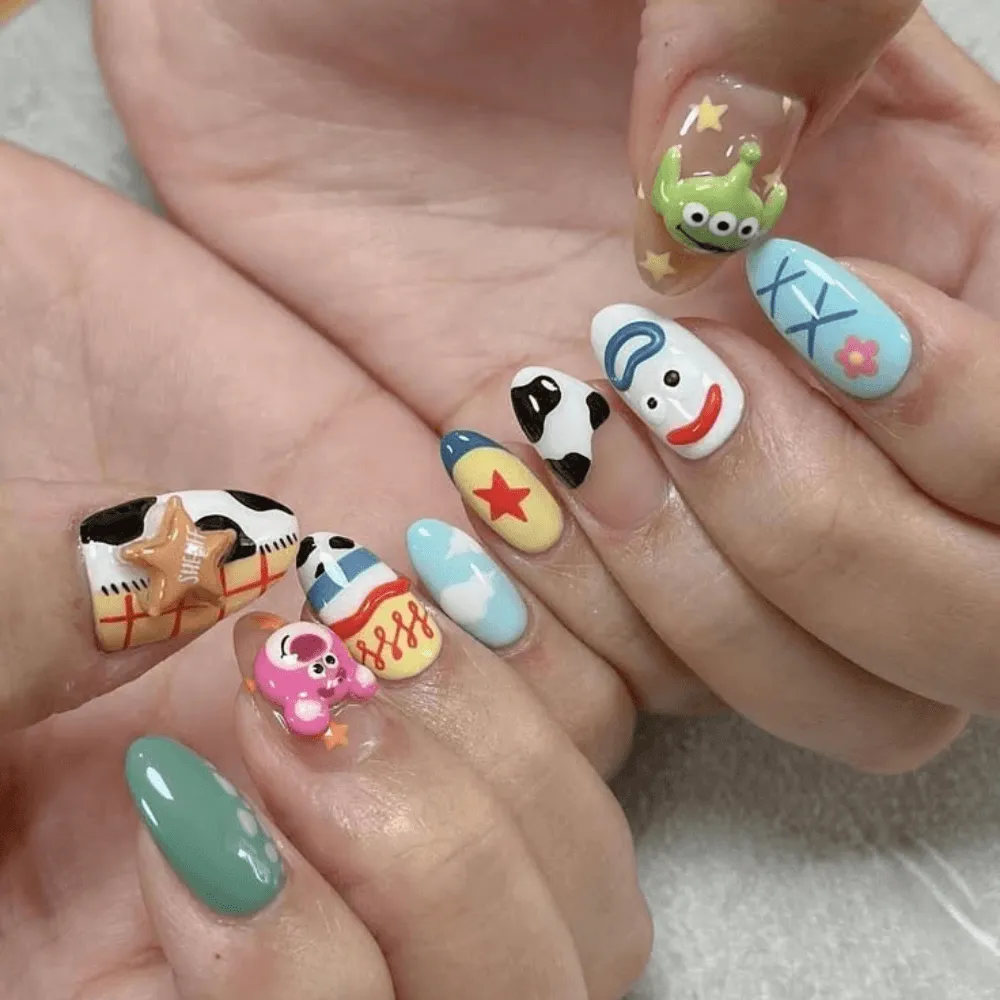
Character-inspired nails use small faces, expressive eyes, playful shapes, or coordinated illustrations to give each finger a distinct personality.
A set might feature different original animal characters in one pastel palette, with plain nails between the detailed illustrations.
Keeping colors consistent helps the artwork feel like a collection rather than unrelated pictures. For detailed miniature faces, ask to see the nail artist’s similar work before committing to a full illustrated set.
Cute Jelly, Chrome & Cat Eye Nails
These designs rely more on finish and light than on traditional painted motifs. Jelly, chrome, magnetic cat-eye, and aura effects all create different appearances.
30. Pink Jelly Glitter Nails
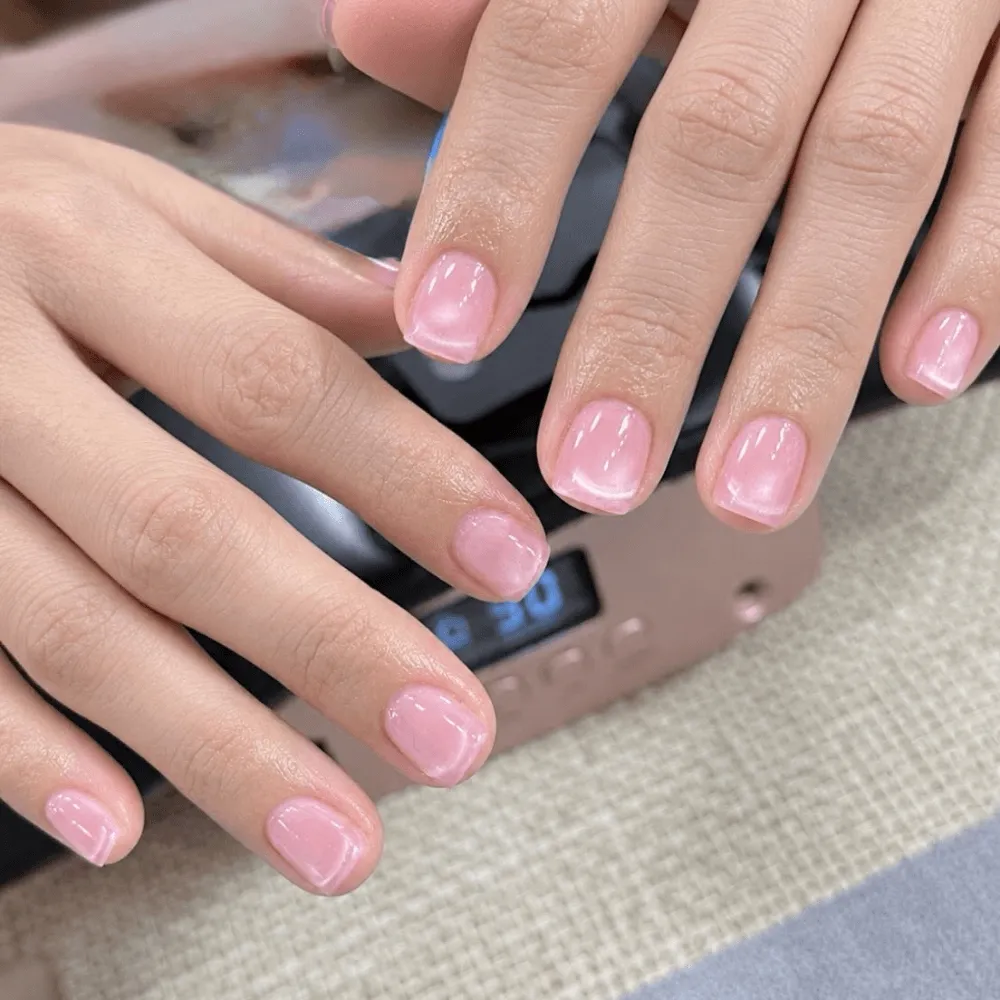
Pink jelly polish allows light to pass through its translucent color, creating a glossy, layered effect.
Fine glitter flakes add small reflective details without turning the manicure into an opaque glitter set. The amount of glitter makes a noticeable difference: scattered flakes leave more of the jelly base visible, while heavy coverage can hide its translucency.
This look works on natural nails as well as extensions, depending on the shape and length you choose.
31. Pearly Glazed Chrome Nails
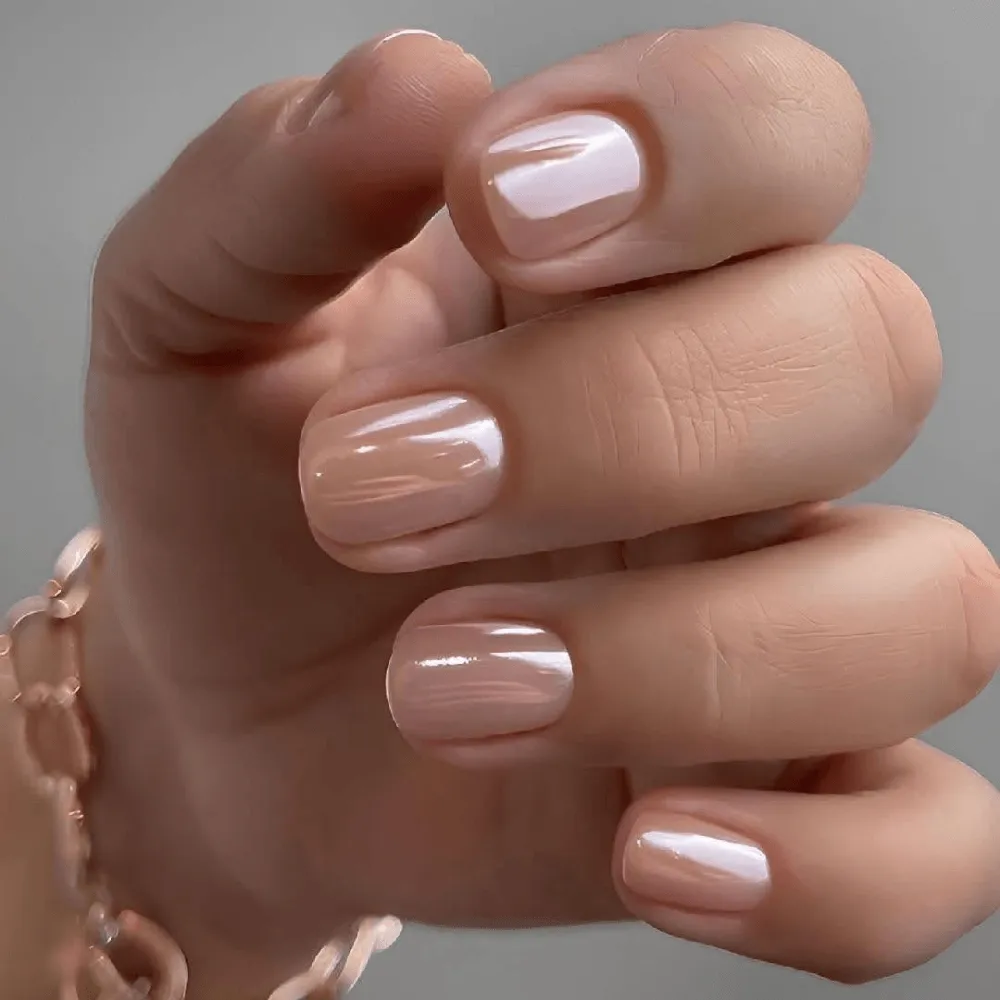
A pearly chrome finish adds a soft reflective sheen over a pale base. Unlike metallic mirror chrome, the effect should look more like a luminous glaze than a solid silver surface.
The base shade influences the result. Pink gives a warmer, rosier appearance, while milky white can look cooler.
Check your reference in more than one lighting condition if the exact sheen matters. Reflective nail finishes may look stronger under direct light than in shade.
32. Pink Velvet Cat Eye Nails
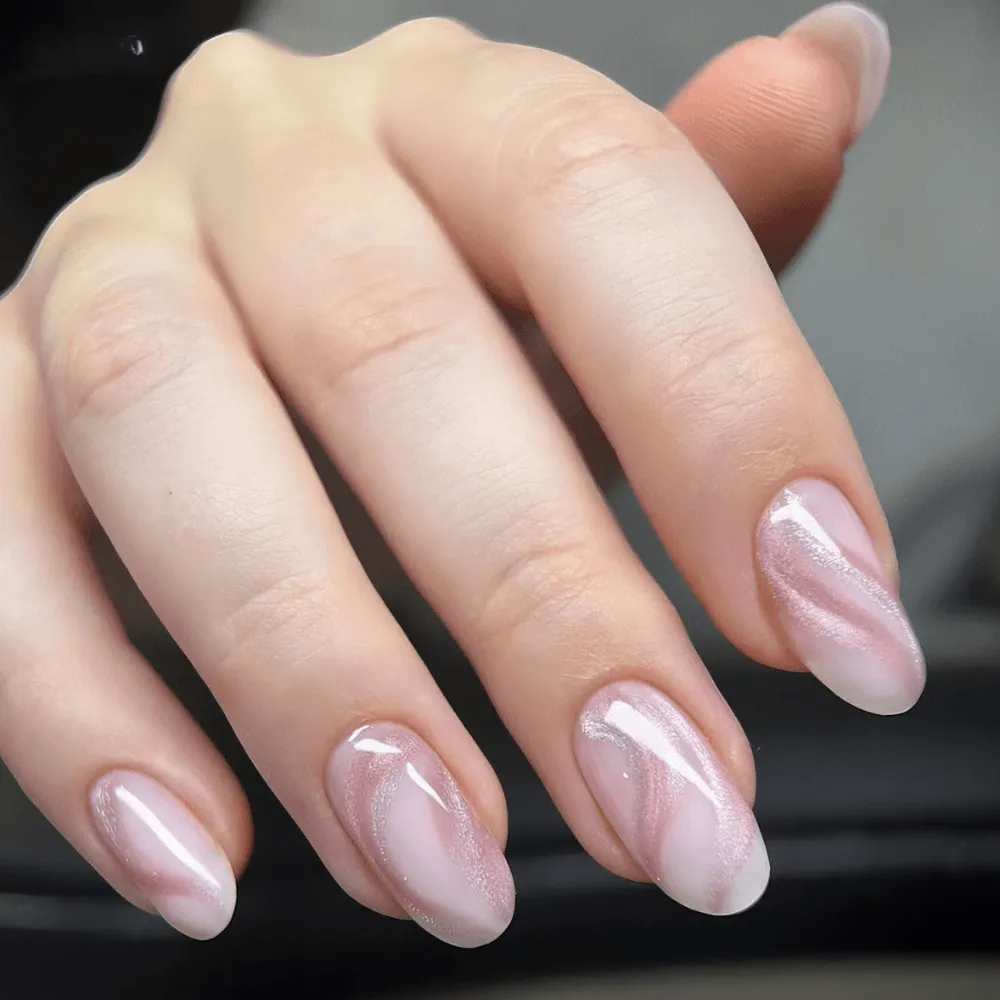
Pink velvet cat-eye nails have a soft magnetic shimmer that shifts in the light. The glow adds detail without any raised decorations. If you like this finish, explore more cat-eye nail designs in different colors and effects.
Instead of one narrow, bright stripe, the velvet effect spreads the reflection more broadly, giving the polish a plush-looking depth.
A pale pink base produces a delicate result, while a deeper rose shade makes the contrast stronger. The magnetic pattern should be visible in the reference photo, because two pink cat-eye manicures can look quite different depending on how the pigment is arranged.
33. Pink Aura Nails
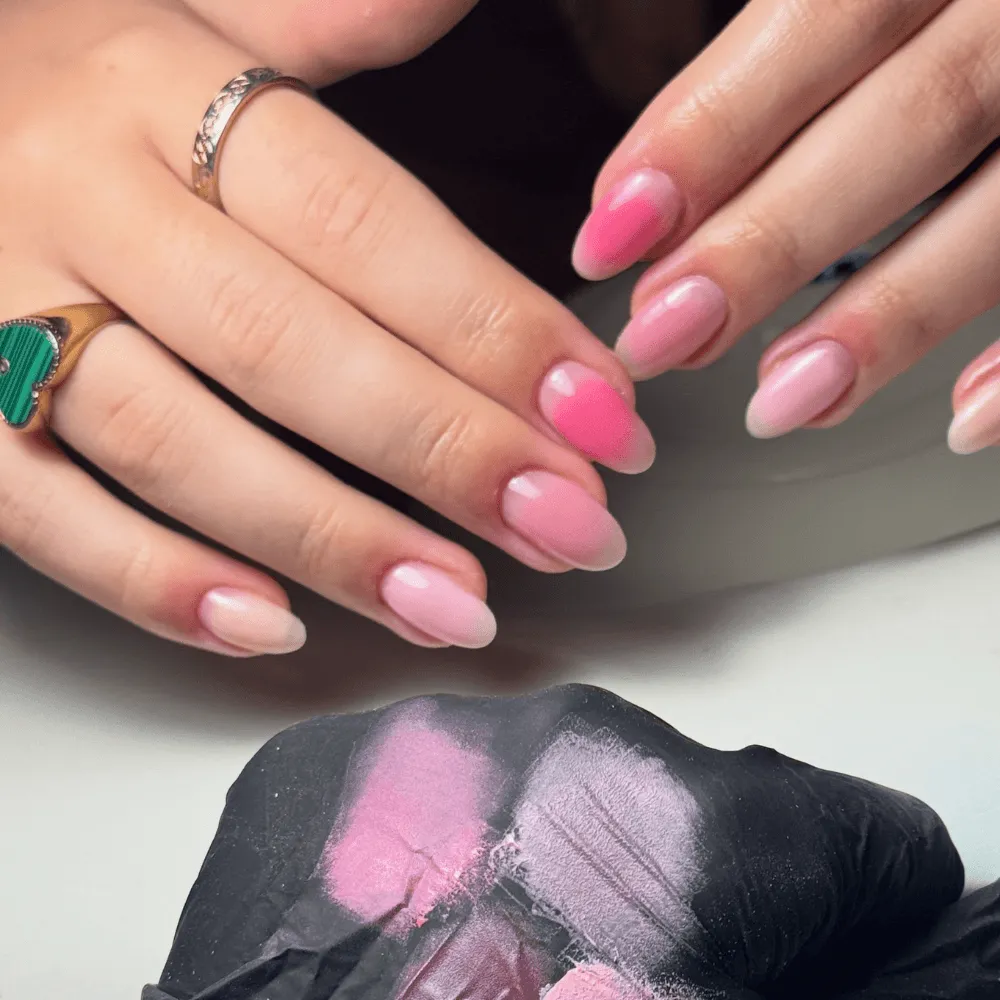
Pink aura nails have a diffused center of color that blends into another shade toward the edges.
A darker rose center fading into pale pink creates a soft glow. Pink blended into lavender gives the manicure a cooler, more colorful appearance.
The transition should look gradual rather than like a sharply outlined circle. Aura nails are primarily about the blended color placement; they don’t require chrome or magnetic polish to achieve the look.
Dark & Alternative Cute Nails
Cute nail art doesn’t have to use pastel shades. Dark colors, bold contrast, and playful motifs can create a completely different version of the same aesthetic.
34. Black-and-Red Cherry Nails
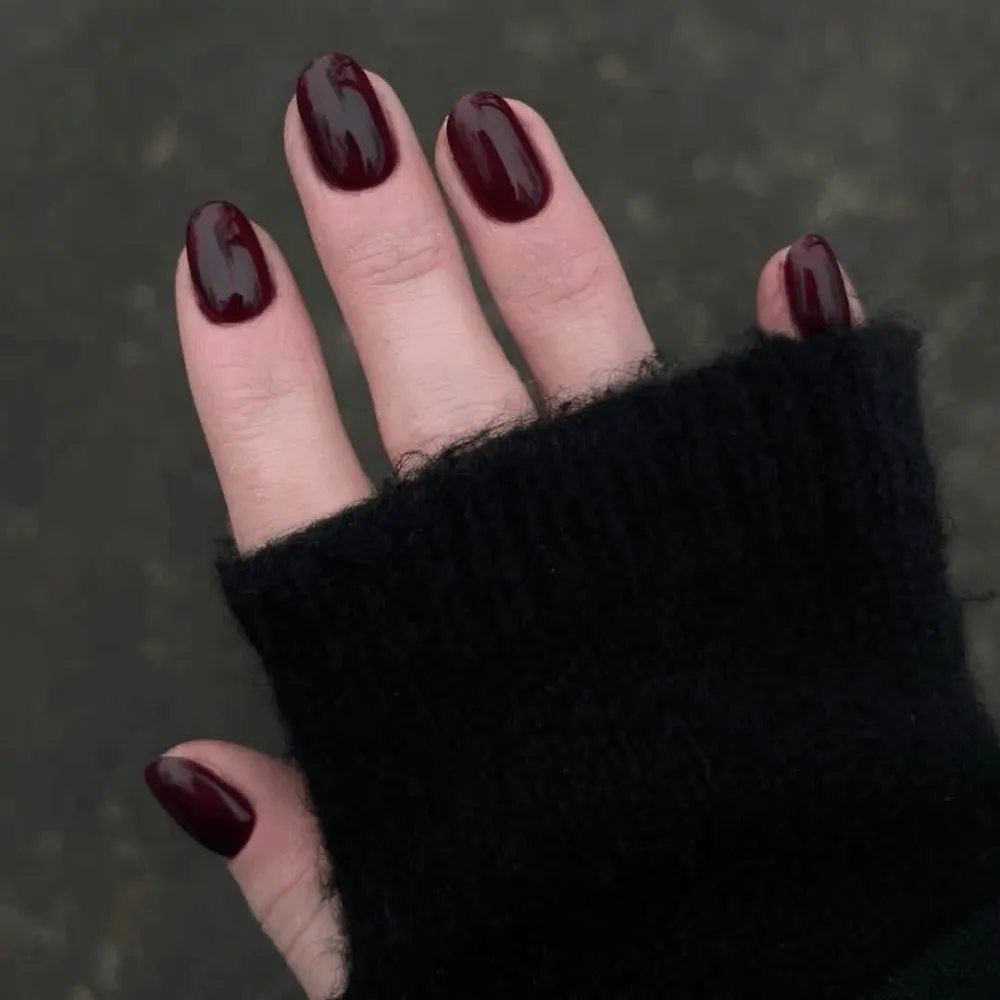
Red cherries against a black or nearly black base create a stronger contrast than the usual pink-and-red combination.
The fruit remains the playful detail, while the darker background gives the manicure a graphic appearance.
A few cherries on selected nails can stand out more clearly than densely repeating the motif across every finger. Thin green stems or small white highlights may help separate the fruit from the dark base.
35. Burgundy Nails With Silver Stars
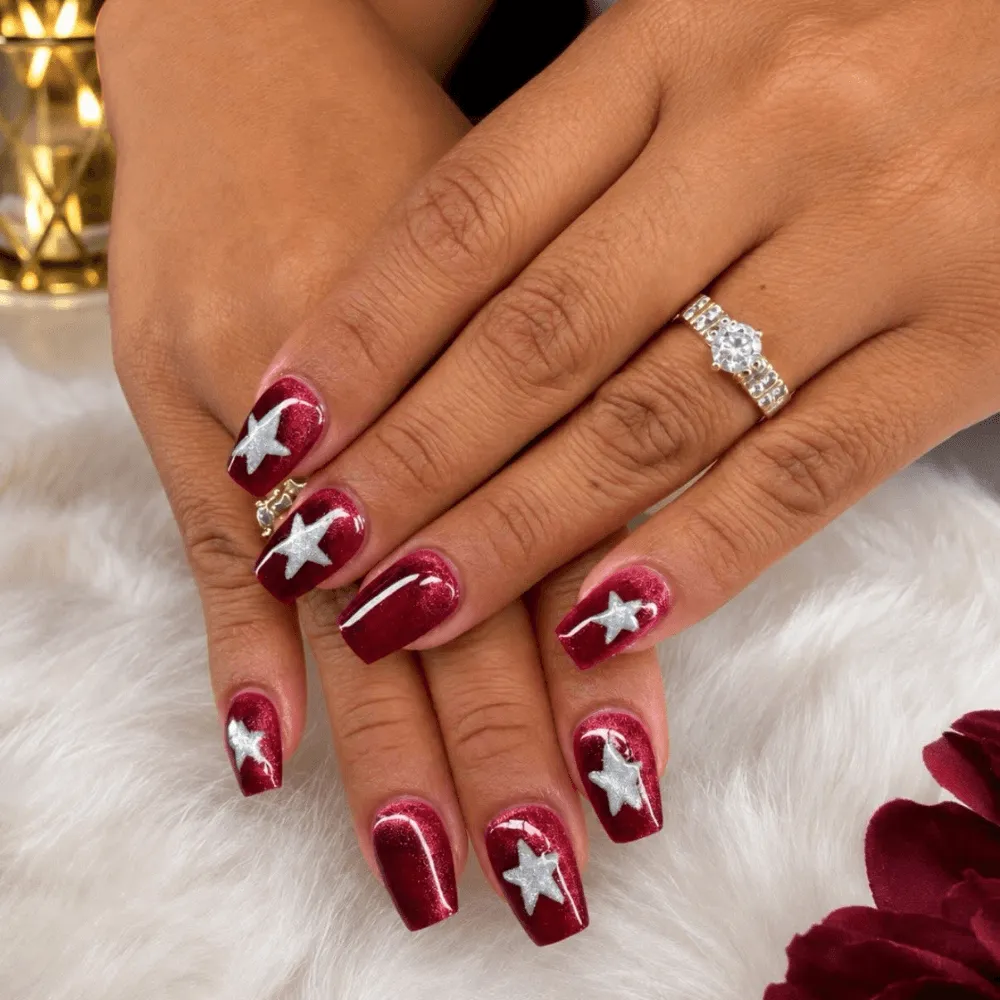
Burgundy polish gives a manicure a deep, glossy base, while miniature silver stars add a lighter, reflective detail.
A few stars scattered across two nails create a restrained celestial design. Larger stars or more concentrated embellishments produce a stronger statement.
Silver works differently from gold here: it introduces a cooler contrast against the rich red shade.
36. Pink-and-Black Zebra Nails
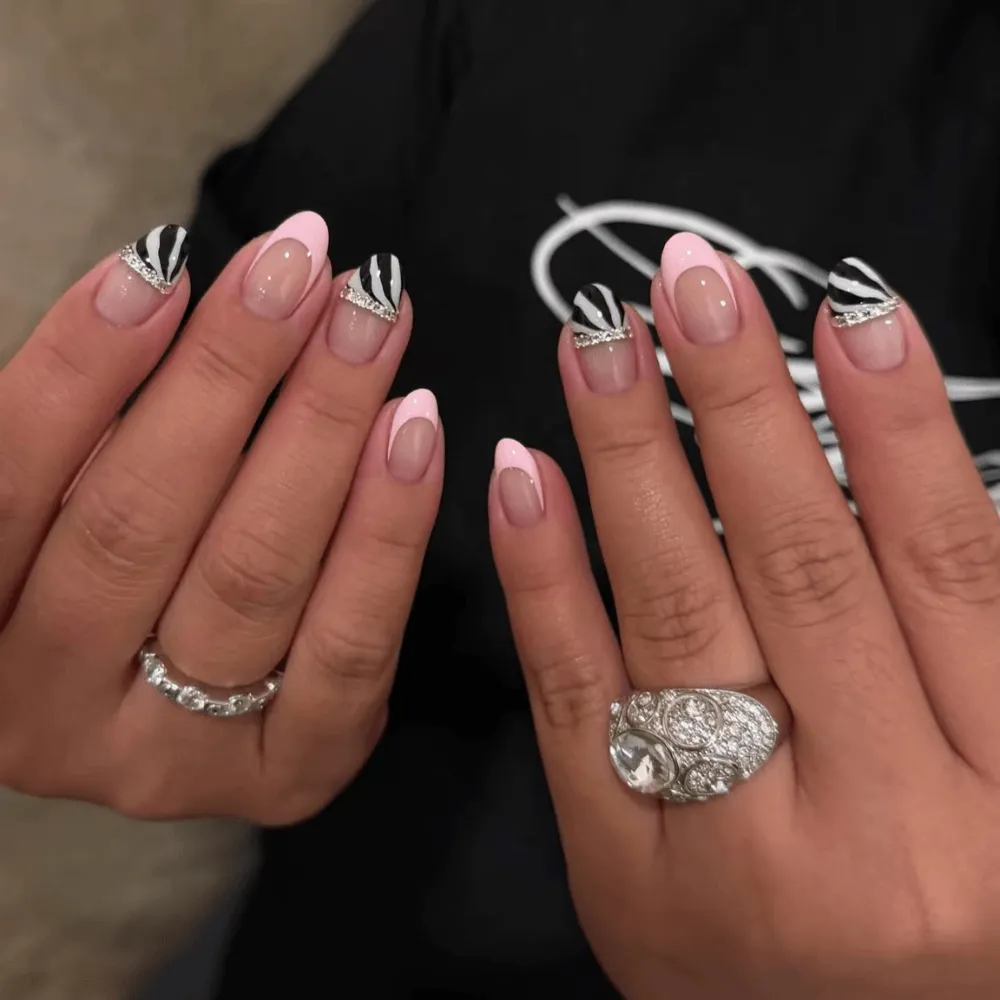
Black zebra stripes over a soft-pink base create a high-contrast pattern that feels playful rather than neutral.
The stripes should vary in width and direction instead of looking like perfectly straight parallel lines.
For a less patterned manicure, use zebra art on two accent nails and keep the rest glossy pink. A full zebra set creates a bolder result, especially on medium or long square nails where more of the pattern is visible.
How to Choose a Cute Nail Design
Start with the designs you actually like, then narrow the choices using your nail length, the amount of detail you want, and how you’ll wear the manicure.
A reference photo can look great on someone else’s hands but need small changes to suit your own nails.
Match the Design to Your Nail Length
Short nails can carry plenty of detail. The main difference is the amount of room available for each motif.
| Nail length | Designs to consider | What to watch |
| Very short | Mini hearts, dots, tiny stars, glossy colors | Keep small details recognizable |
| Short | Cherries, daisies, micro-French, jelly finishes | Avoid squeezing too many details together |
| Medium | Swirls, butterfly art, ribbons, decorated French tips | Balance detailed and plain nails |
| Long | Character art, larger patterns, dimensional accents | Consider practical length and comfort |
Nail shape matters as much as length. Oval nails have a rounded tip, while almond nails taper to a soft point and generally need more length. If you’re choosing between these two shapes, my oval vs. almond nails comparison explains the differences.
Neither shape is automatically better for cute nails. Choose the shape you can comfortably maintain, then adjust the design to fit it.
Choose Between Simple and Detailed Nail Art
A plain pastel manicure, polka dots, and a sculpted 3D flower may all look cute, but they don’t require the same amount of work.
Solid colors and simple alternating shades are straightforward options with regular polish. Dots and basic accent details can be approachable with a little practice.
Intricate checkerboard patterns, miniature character faces, and precision-painted ribbons require more control. Chrome and magnetic effects depend on suitable products and techniques, while raised artwork adds another level of complexity.
If you’re doing your nails at home, choose the design according to the tools and skills you already have. A simpler version of a favorite design may be more satisfying than attempting every detail at once.
Think About Everyday Wear
The most useful manicure is one you enjoy looking at and can comfortably wear.
Flat designs such as hearts, flowers, and swirls don’t introduce raised decorations. Pearls, charms, and sculpted flowers add texture but can be more noticeable when handling clothing, washing your hair, or wearing gloves.
Length matters as well. Short nails may be more convenient for typing, sports, or hands-on work, while longer extensions require different habits.
Workplaces, schools, and certain jobs have their own nail requirements. Check those before choosing long extensions or raised decorations, particularly when hygiene or glove use matters.
A cute design doesn’t need to be complicated. A glossy neutral manicure with one carefully placed accent can express just as much personality as a full set of illustrated nails.
How to Ask for Your Favorite Cute Nail Design
Save a clear photo of the design you like, then identify the details that matter most before your appointment.
Your nail technician needs more than a general request for something pink, simple, or cute.
The five useful details are:
- Length and shape: Short squoval, medium oval, almond, square, or your preferred shape.
- Base color: Sheer pink, milky nude, pale blue, or the shade shown in your reference.
- Artwork: Which motifs appear and how large they should be.
- Placement: Every nail, selected accent nails, near the cuticle, or along the tips.
- Finish: Glossy, matte, jelly, pearly, chrome, magnetic, or another specific effect.
For example:
“I’d like short oval nails with a sheer milky-pink base, tiny red cherries on both ring fingers, and a glossy finish. Please keep the remaining nails plain pink.”
That gives the nail artist a clear starting point without prescribing every technical step.
For magnetic, chrome, or dimensional designs, show the actual reference photograph and discuss the finish or texture before application. Those details can be difficult to communicate through color names alone.
Save two or three favorites from the gallery, compare them against your nail length and routine, and bring the clearest reference to your appointment.
Frequently Asked Questions
Can you get cute nails without acrylics?
Yes. Natural nails can look cute with pastel polish, tiny hearts, polka dots, French tips, or jelly finishes. You can use regular polish, gel polish, or nail stickers without acrylic extensions.
How can I make cute nail art last longer?
Start with clean, dry nails, apply a compatible base coat, and use thin polish layers. Seal the design with top coat after it dries. Wear gloves when cleaning and avoid picking at polish. For gel, follow the manufacturer’s curing instructions.
Are press-on nails or salon manicures better for detailed cute designs?
Press-ons are convenient for ready-made designs and quick application. Salon manicures offer more customization in colors, shapes, and artwork placement. Choose press-ons for convenience or a nail technician for a personalized design.
What are the easiest cute nail designs to do at home?
Mismatched pastel nails, polka dots, tiny hearts, and accent nails are beginner-friendly choices. Use a dotting tool or bobby pin for dots, a toothpick for simple hearts, and nail stickers for detailed patterns. Finish with top coat once the artwork dries.